How To: Temporary Mounting for Puzzles – Step 1 Contact Paper
What is ‘temporary mounting’? It’s mounting a puzzle in such a way that you can display it or just keep it assembled for your edification, but you can also undo it all and still have the puzzle to work sometime down the road if you choose.
It should be obvious by now that I do a lot of jigsaws and have for many years. For years and years, I would finish a puzzle, look at it for a few minutes, take a picture of it, and then break it all up and put it back in the box. Most of the puzzles I do wouldn’t especially go with my home decor so I had no burning desire to hang them. And too, I hated the thought of gluing a puzzle together so that I could never do it again. To me, that’s like gluing a book shut!
But lately it’s gotten harder and harder to pull that puppy apart when I’m done. It begins to feel… futile, all that work. And I’m looking at older Heye’s I assembled years ago and wishing I still had them intact so I could see what they looked like large, examine the piece cut, show them to other puzzlers, and have proof that I actually did them!
You can buy frames from Puzzle Warehouse that allow you to leave a puzzle unglued, but at $40 for a single frame, the cost doesn’t lend itself to scale.
Puzzle Warehouse also sells a Puzzle Storage box where you can store smaller 1000 piece puzzles. This is a good solution if most of your puzzles will fit it and you don’t do that many. But I often do larger puzzles than will fit. Plus, it only holds 10 and it’s relatively expensive ($7.50 per puzzle). Plus, it felt like I wouldn’t look at the puzzles much if I had to open the box and lift them all out, etc. I wanted something that would keep the puzzles visible.
So I set out to find a solution.
Goals for finding a temporary mounting method:
1. Be able to keep the puzzle intact so I can see how it looks assembled and display it if I want to, or keep it propped up against a wall with a bunch of others for easy access.
2. Be able to undo the mounting so that I can put the puzzle back in the box or work it again someday.
3. Have the temporary mounting be as cheap as possible since I do a lot of puzzles.
4. It needs to be quick and easy. I want to spend my free time making puzzles, not mounting them.
I found something that works for me, so I’ll share it with you.
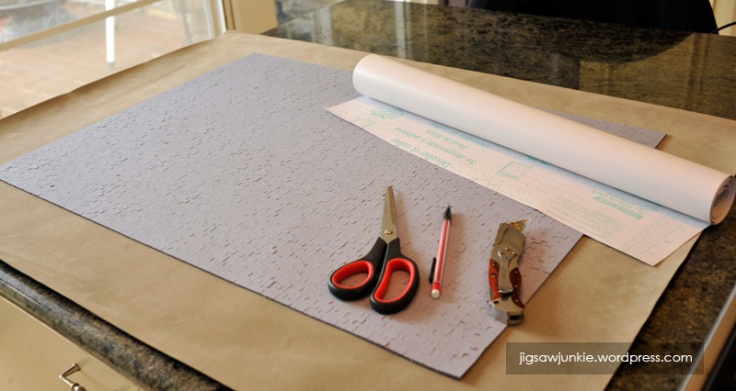
Supplies Needed:
* Foamcore board (I used Elmer’s brand white, but you may want black for some puzzles)
* Box Cutter, Scissors & Pencil
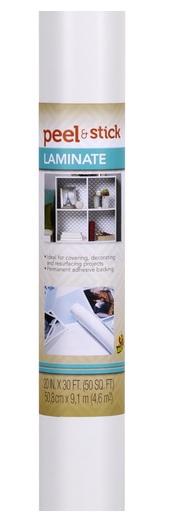
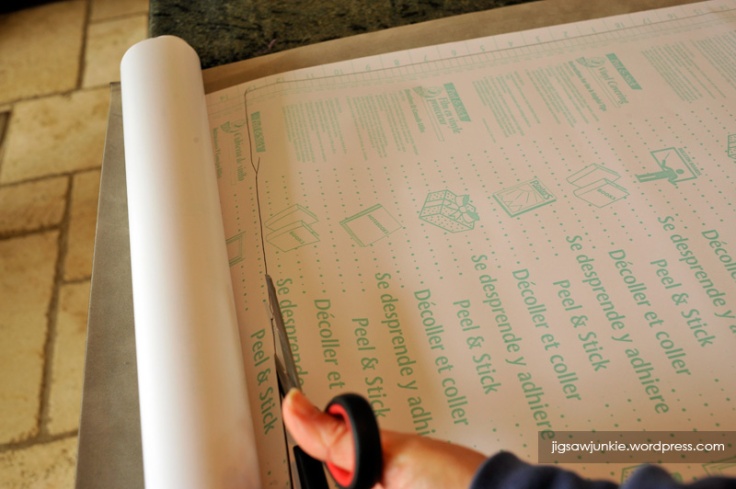
* Contact Paper (I use Duck Brand Peel ‘N Stick vinyl laminate in 20″ rolls. Any color is fine.)
* Glue (I use Aleene’s Tacky Glue, but many glues would work)
* Optional: Plastic shrink wrap or bag to cover finished puzzle
Step One: Applying contact paper
This is the key to having a mounting be temporary. If you use puzzle glue to hold the puzzle together, there’s no way that’s reversible. But with the right contact paper, it can be done.
I use this Duck Brand Peel ‘N Stick laminate paper. Get the 20″ wide size, which comes in a 15′ or 30′ length roll. You can get it in clear, white, black, or various patterns. I use white. When you place this on back of your puzzle, it sticks well, but can be peeled off without leaving glue or adhesive on the puzzle pieces. WARNING: I can’t guarantee that five years later, or after storing the puzzle in 100 degree heat, etc., the adhesive won’t transfer. But it didn’t in the tests I tried.
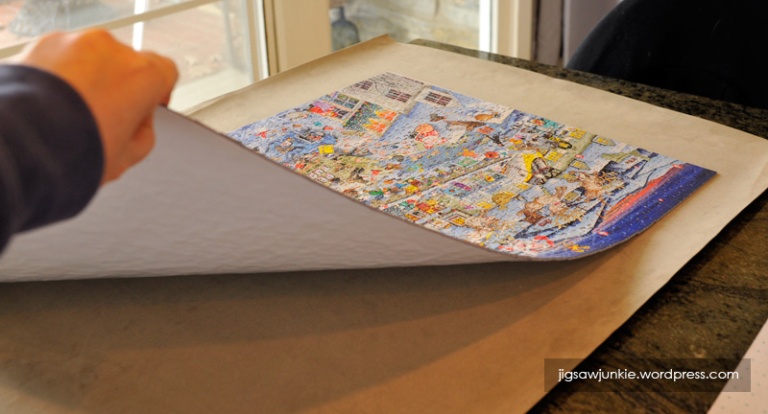
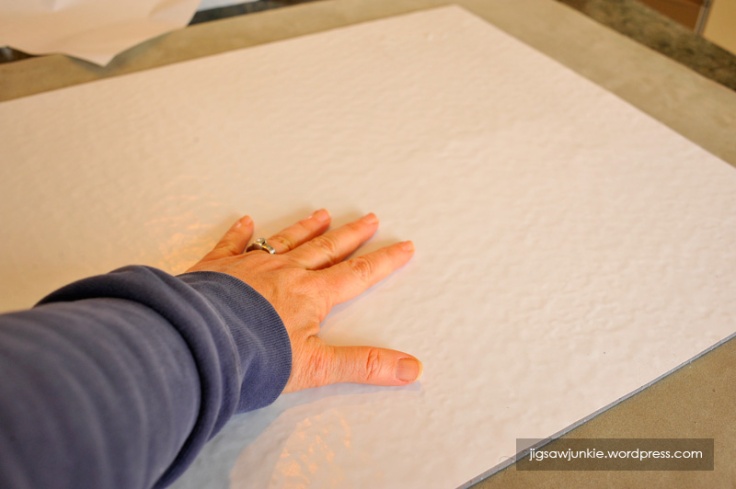
1. Getting ready to apply the paper. The most important thing is to make sure your puzzle is on a flat surface, not ones with bumps, so your puzzle can lie absolutely flat. You’ll need to flip the puzzle onto it’s face, which you can do easily if you built it on a Jigboard or white posterboard or something similar. Simply put something at least as big as your puzzle on top of the puzzle (the cover that comes with a Jigboard works), put a hand under the board while leaving the other hand on top of the cover, and quickly flip it. If it’s a larger puzzle you might want to have two people, one on either end, to make sure the puzzle stays intact. Once the puzzle is flipped, smooth it down with your hands to lie flat.
2. Measure the contact paper. Roll the paper over the back of your puzzle. Line up two edges and let any overhang go off the other two sides. If your paper isn’t wide enough to go across the width of the puzzle no worries, you can apply a second ‘row’ later. If you do have to apply more than one row of paper, make sure to overlap by 1/2″ or so. This will ensure that the glue you will be putting on the contact paper doesn’t get through any cracks to the puzzle itself.
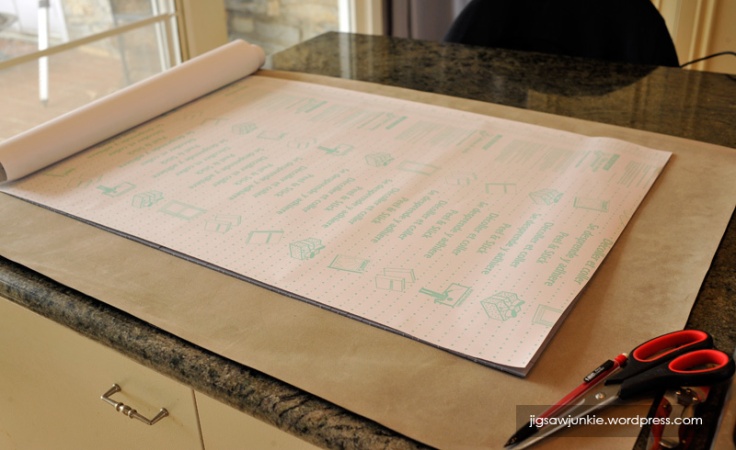
Once you have two edges lined up, you can simply trace the edges on the other two sides with a pencil. You can feel them through the contact paper.

3. Cut the contact paper to size. Cut along the lines you made. Be generous, as it’s better to have the contact paper overlap the puzzle a bit than to have a gap between the contact paper and the edge — again, you want good coverage so that you won’t get glue on the puzzle itself.
4. Pulling off the back of the adhesive paper.
Turn the contact paper so the adhesive side is facing down over the back of you puzzle. Line up all the edges. Start the peel.
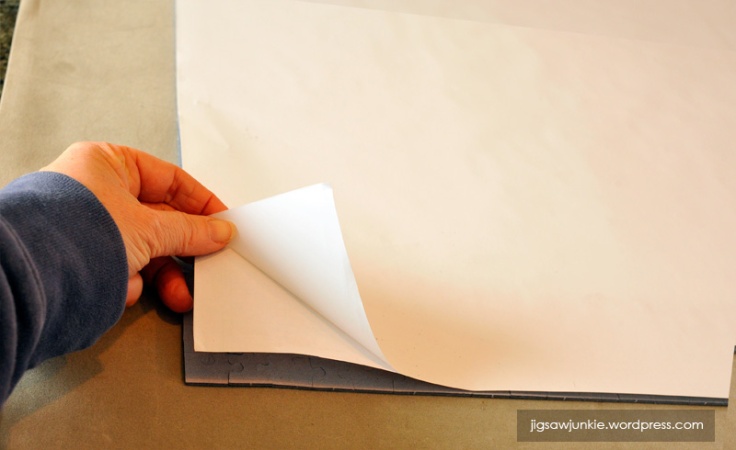
What works best for me is to pull away the first inch or two of the contact paper backing, folding it underneath. Then I can make sure my edges are straight before I get too far along with the very sticky contact paper. Once the edges are straight, press the paper down so it adheres to the puzzle back.
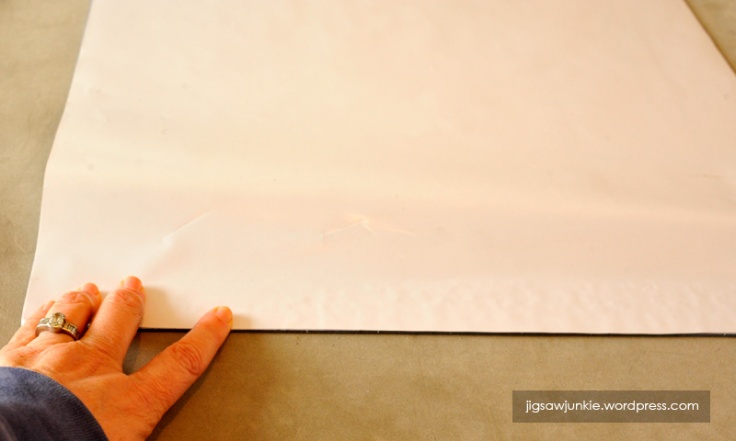
Now you can slowly pull the waxy paper off from underneath, a few inches at a time, smoothing with your other hand as you go.
5. Smoothing the puzzle.
Once the waxy backing paper is completely removed, use your hand or a rolling pin to press the contact paper fully to the back of the puzzle. It will get bumpy from the puzzle texture.
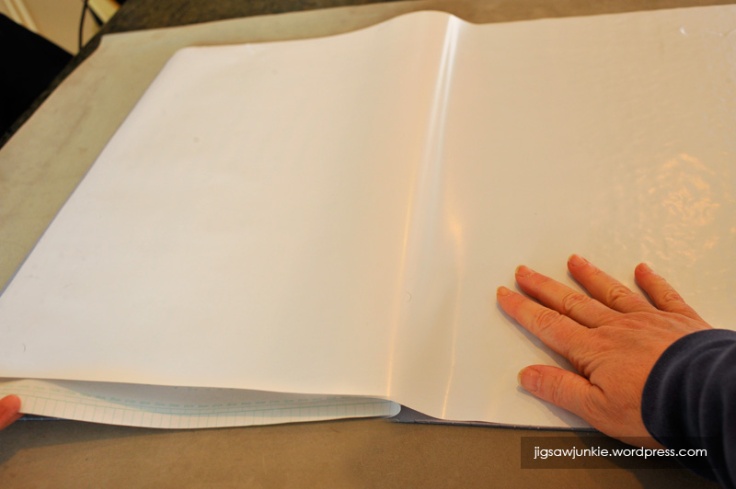
Carefully turn the puzzle onto its front. The contact paper will hold the puzzle together, but it’s pretty floppy and pieces can come loose, so use care.

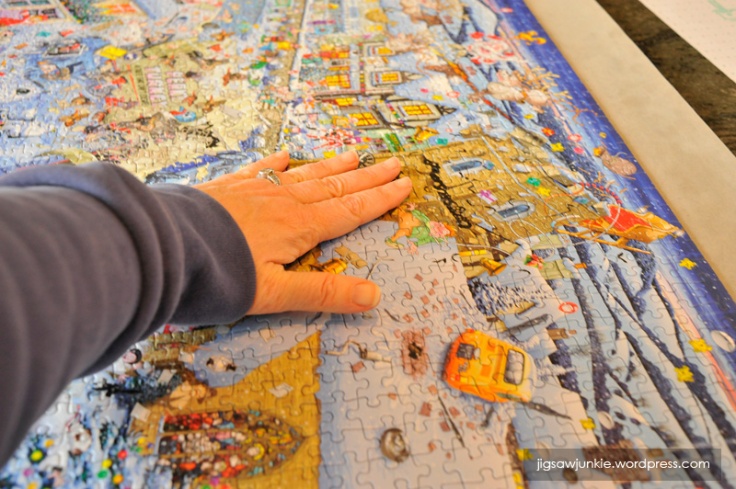
Smooth over the top of the puzzle too to get it flat. You can use your hand or use the wax paper you peeled of the back over the top of the puzzle to protect it, and then lightly use a rolling pin over the surface.
6. Trim any excess.
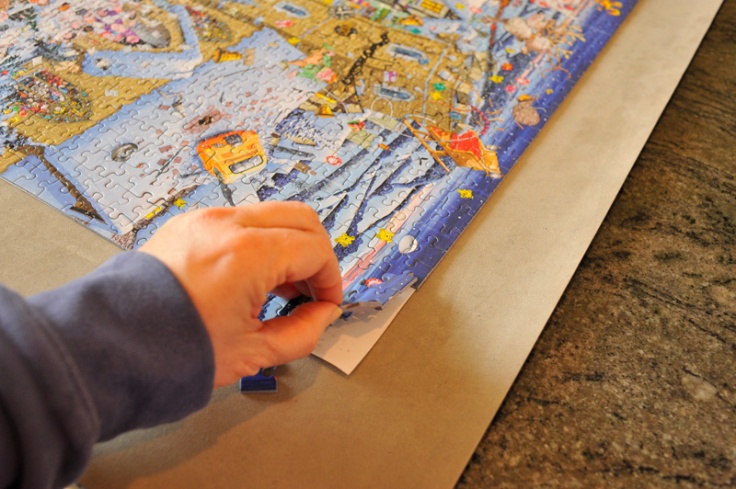
Remember I said it’s better to have as full a coverage as possible with the contact paper, so you can avoid glue (which we’ll be applying to the contact paper in step two) to get onto the puzzle itself. So where there’s contact paper sticking out from the sides, you can just used a box cutter knife to remove it, pressing the side of the blade against the side of the puzzle to get close.
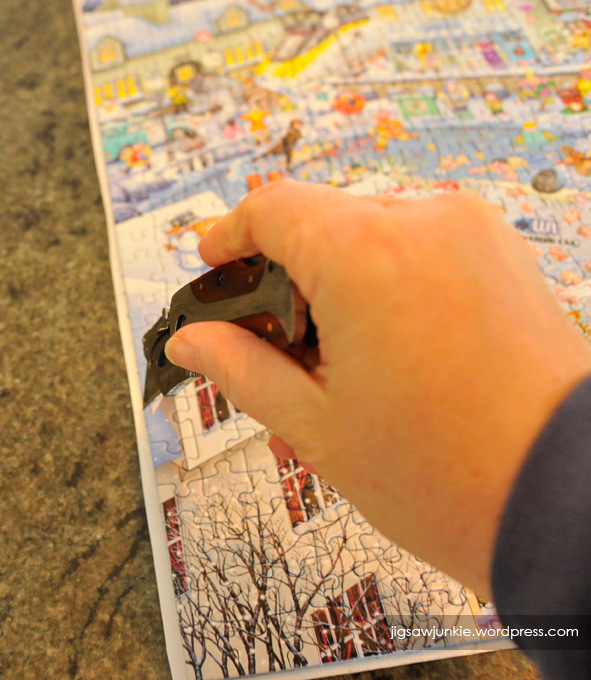
OK, so now we have contact paper applied to the back of our puzzle. It’s easier to move it around without it falling apart now, but so far, it’s still pretty fragile. You can easily pull the pieces off of the sticky paper (see below). So what do we do next?
Continue to STEP TWO: MOUNTING THE PUZZLE ON FOAMCORE
JJ