HOW TO: TEMPORARY MOUNTING FOR PUZZLES – STEP 2 Mount on Foamcore
See Step One of this process here.
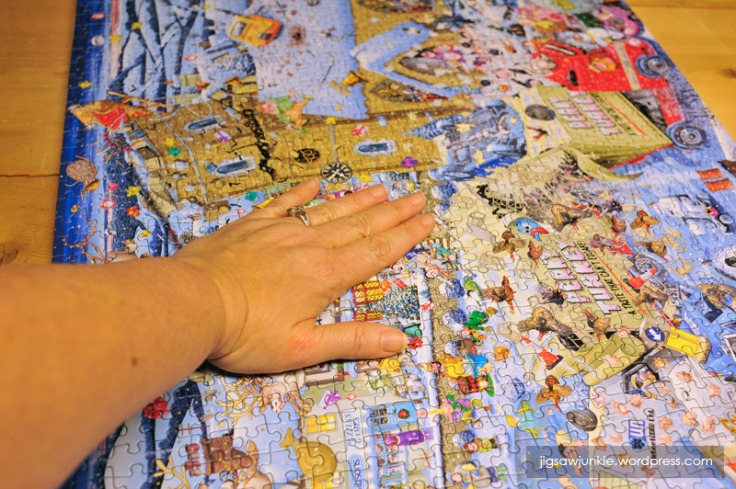
In Step One we put adhesive contact paper on the back of our puzzle. This allows the puzzle to hold together–mostly. But it’s still floppy and fragile. So in this step, we’ll mount that contact-paper-backed-puzzle to a foamcore board.
You can get 1/4″ foamcore board at most craft and art supply places. In this case, my 1000 piece Gibsons puzzle is 19″ x 29.5″, so I’m using a 20″ x 30″ foamcore board.
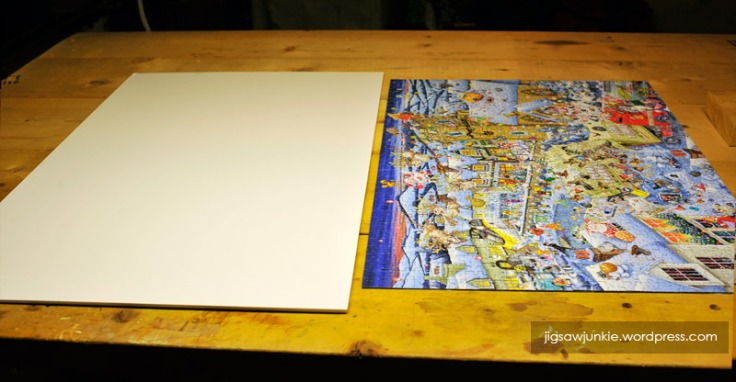
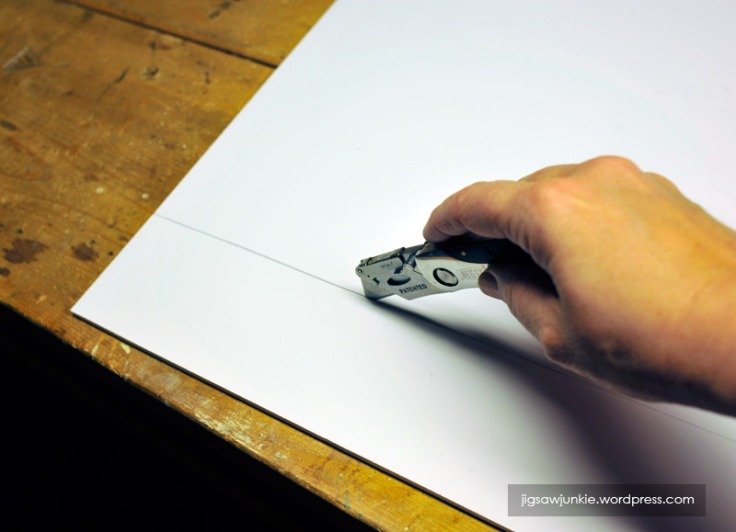
1. Put the puzzle on the foamcore board and mark the measurements.
Lining up two edges, I had excess on 2 sides.
I drew along the edge of the puzzle with a pencil.
2. Cut the foamcore to the measurements.
Now that the two lines I need cut are marked, I just follow them with a box cutter to easily cut the foamcore.
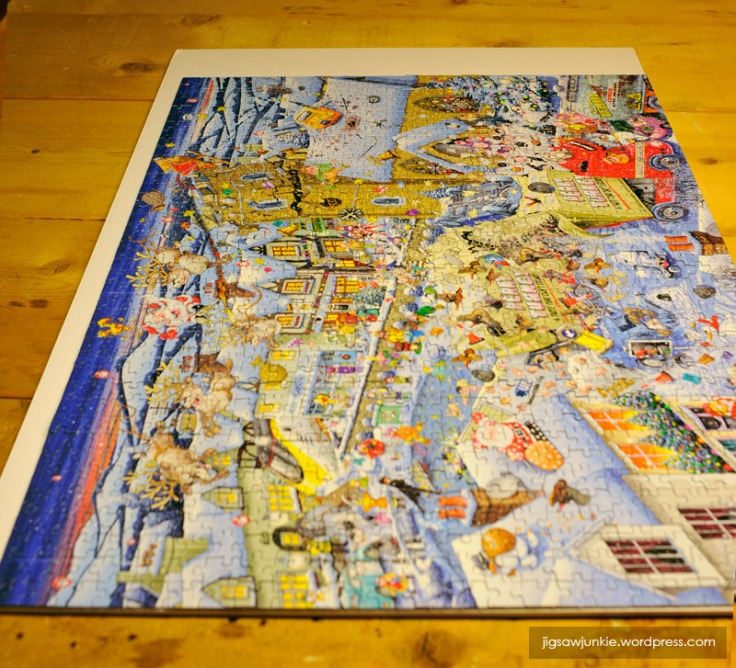
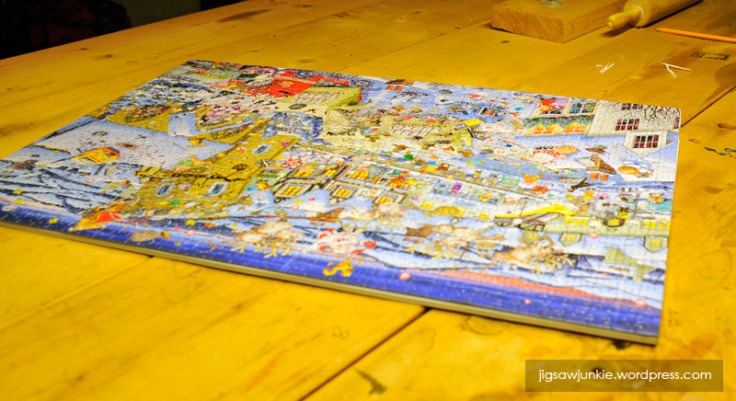
3. Check the size.
Double check that the puzzle fits on the foamcore without visible overhang. If you can see more of the foamcore board than you like on the sides, you can cut more off.
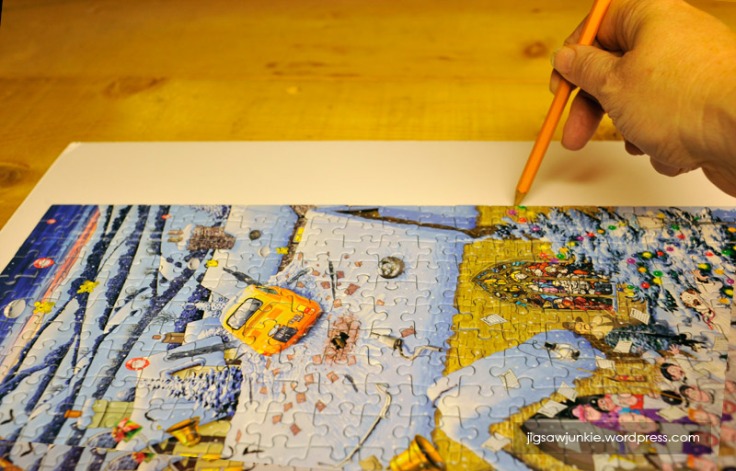
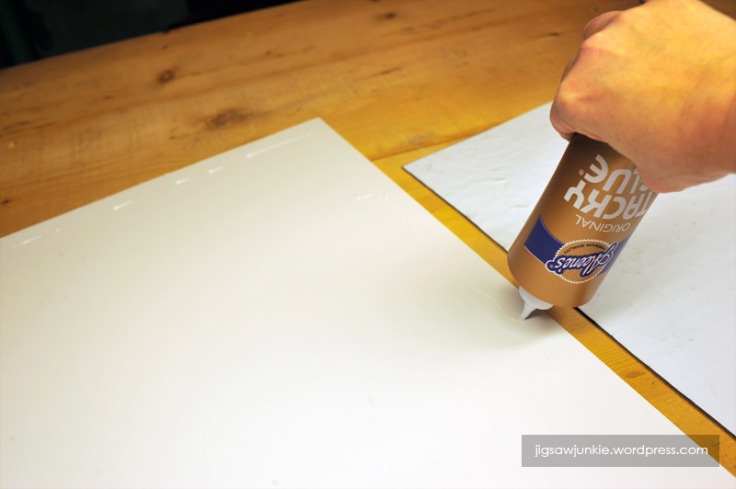
4. Put glue on the foamcore board.
Take the puzzle off first, of course! I run a line around the border, staying in a half inch or so in order to prevent glue getting on the edge of my puzzle (remember, the goal of a temporary mount is to avoid getting glue on the puzzle itself so you can disassemble it and still have the puzzle later on). After the border is ‘drawn’ in glue, I zig zag glue in the open white space. You probably won’t need to coat it. If your glue is strong, a little goes a long way.
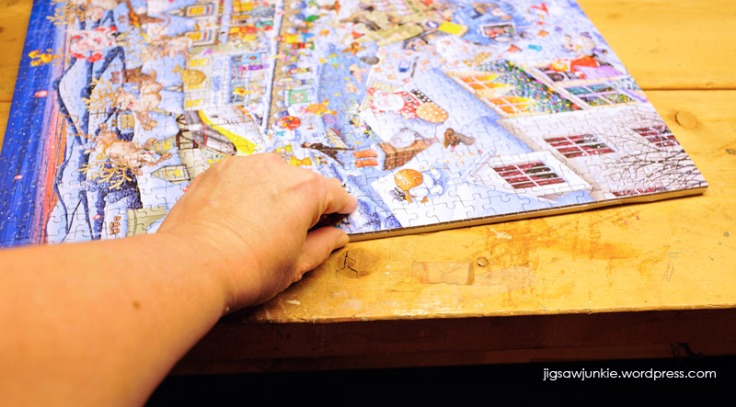
5. Position the puzzle, face up, on the foamcore board, lining up the edges.
My glue sets fast so I only have a few seconds to get the edges lined up before the puzzle becomes impossible to move on the foamcore.
6. Press down on the puzzle to spread the glue.
Just gently press down all over to make sure the glue on the board has good contact with the contact paper that’s on the back of the puzzle.
7. Weight down the puzzle/board for an hour or so.
You can use books or whatever you like. Since I do this in my basement, I just put the puzzle/board on the floor and lay a heavy box on top of it. Note that something TOO heavy might crush the foamcore or puzzle. You just want to hold the puzzle firmly to the board until the glue dries.
That’s it! This goes super fast actually. I have foamcore boards in 3 sizes.
20″ x 30″ — fits most 1000 piece puzzles except for the oversized ones like Springbok and White Mountain
24″ x 36″ — fits the oversized 1000 piece puzzles (White Mountain, Springbok) and the regular sized 1500 piece puzzles like Heye or Ravensburger
30″ x 40″ — for regular 2000 piece puzzles like Heye or Ravensburger
Alternatively, you could just get the biggest size you might need and cut off more for the smaller puzzles.
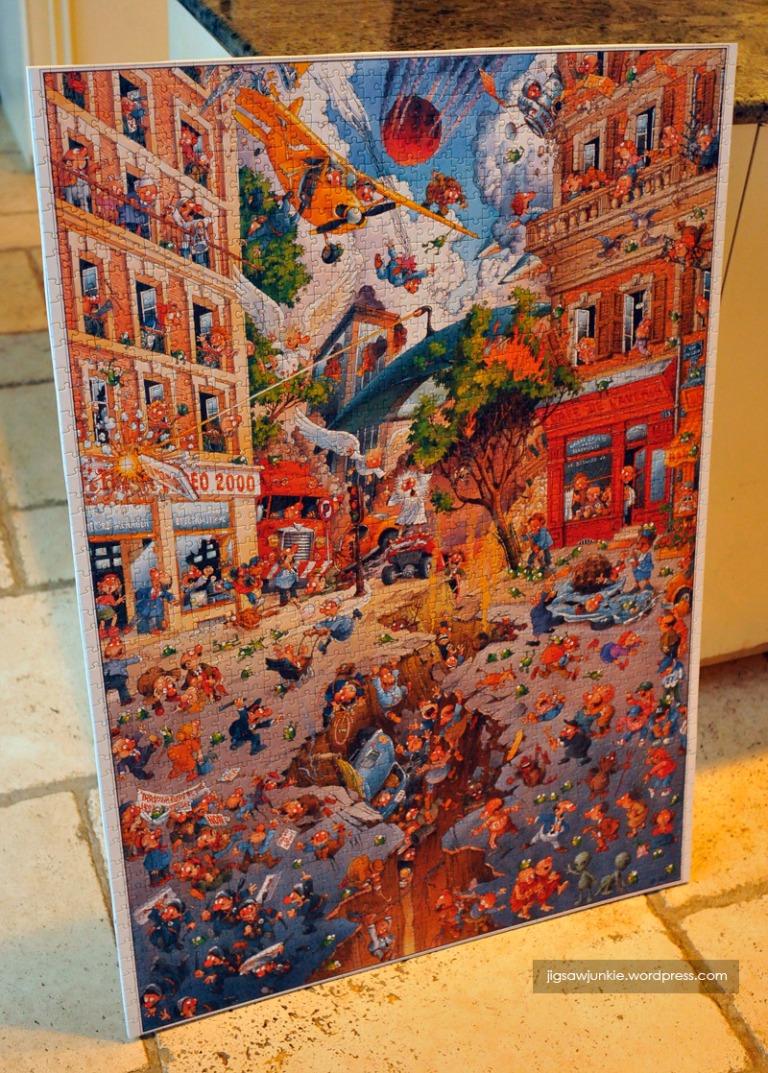
Below are three of my recent puzzles that I’ve mounted through this step.


At this point, the puzzle is sort of stable. If you just intend to hang it up on a wall, and it won’t be subject to any upheaval, dogs, kids, etc, you might not need to do Step 3, which is to put a clear plastic cover over the entire thing. However, remember that, while the BACK of the contact paper is permanently glued now to the board, the puzzle itself is merely sitting on the light adhesive of the front of the contact paper, and it’s still possible to just peel off a piece. So I feel more comfortable wrapping mine so that I know there’s no way a piece is going to get knocked off and lost forever.
Continue to — STEP THREE: SEALING YOUR MOUNTED PUZZLE IN PLASTIC.
JJ