
How to Assemble a Jigsaw Puzzle
I have gotten some emails asking me to share tips for assembling puzzles and/or my method.
If you’re new to puzzling, returning to it after a long time, or just want to see how someone else does it, check out this walk-through. In the end, no method is right or wrong as long as you get from Point A (bag of puzzle pieces) to Point B (completed puzzle). However, this is my standard operating procedure. If you have other tips/methods, please feel free to post them in the comments.
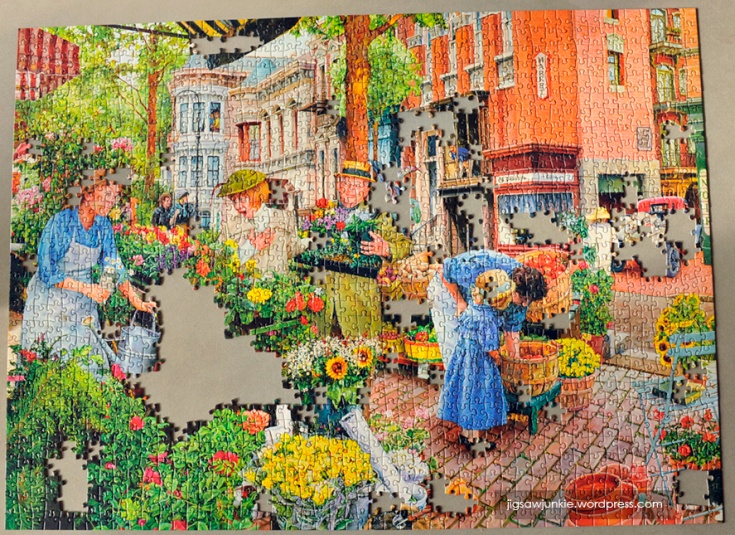
Note: The puzzle I’m working in this example is Bits and Pieces “Sidewalk Flower Sale” by Americana artist Susan Brabeau.
1. Choose a spot to assemble your puzzle
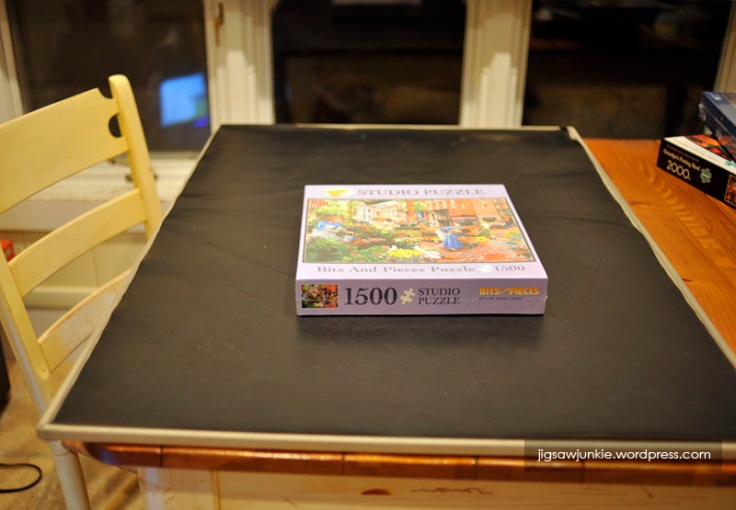
You need a place that is not going to be disturbed until you finish the puzzle (or one that can be moved), has decent lighting, and, most importantly, is large enough. All puzzles list their finished dimensions on the box, so you can measure if in doubt.
I recommend using a Jigboard.
I’ve been using a Jigboard for several years now and I never do a puzzle without it. A Jigboard is a large but lightweight board with a felted surface and a sheet of material that fits over the top. You can get them in various sizes, but I use my Jigboard 2000 for everything, even 1000 piece puzzles. I like having the extra space. You can get one here.
Why use a Jigboard? Because:
- You can put on the top cover when you’re not working on it. This protects you from losing pieces to cats, dogs, kids, accidental bumps, earthquakes, food spills, etc. I always put on my Jigboard cover when I stop working on a puzzle.
- You can move it off the table. If you have company come visit or need the table for a meal or whatever, just put the cover on the Jigboard, pick it up (careful to keep it flat), and slide it under a bed or the couch or wherever it will fit. Everything stays safe and dust free.
- You can rotate the puzzle. I often rotate my Jigboard so that I can work on various sides of the puzzle more easily.
- It makes the puzzle easier to flip the puzzle in the end. I have gotten in the habit of doing a temporary mount of my puzzles. In order to do this, I need to turn the puzzle over. That would be very difficult if the puzzle was just on the table.
- It has a felt surface and slight edges which help keep pieces from falling to the floor.
Using a table instead
If you’re just getting started with puzzling, or don’t do very many, you may not want to invest in a Jigboard. It’s perfectly fine to use a table too. Just make sure the final dimensions of your puzzle will fit on the table. If you have kids or animals, you may want to put a large flattened cardboard box or something similar on top of the puzzle when you’re not working on it.
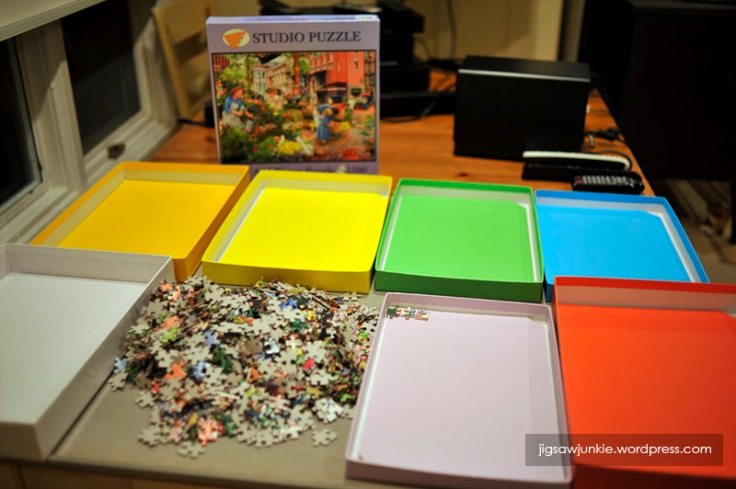
2. Sort and turn up your pieces
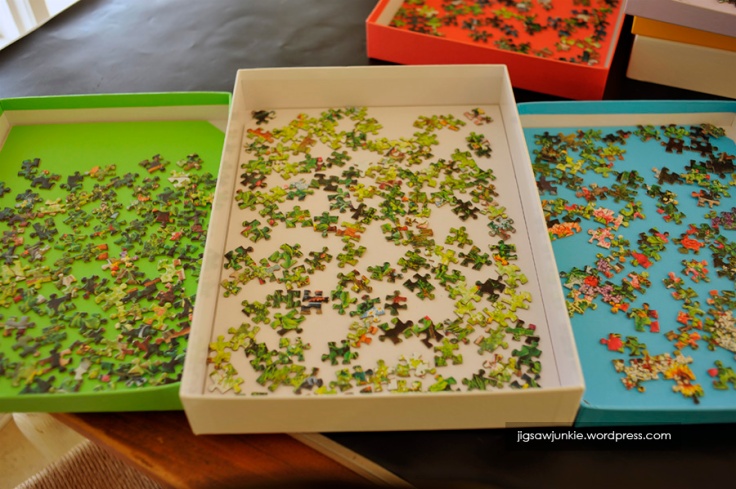
I arrange everything on my Jigboard, laying out the boxes I use for piece storage and dumping the bag of puzzle pieces in the middle. Sorting is an organizing task that takes an hour or so at the start of your puzzle. I use a Jigsafe for piece sorting, which you can get here. There are other similar products on the market, just make sure they hold at least 1000 pieces, stack, and have inserts in the bottom (you’ll see why later).
This may seem like a tedious task (well, it is), but it will save you a lot of time in the end. I watch TV or listen to a book on tape while I do it. I used to just dump all the pieces in the box bottom and pick through them constantly to look for pieces for whatever area I was working on. You can certainly do that. But sorting has beaucoup advantages:
- It saves times. This is a “turn up once and done” approach. So instead of riffling through a big box of pieces over and over again looking for bits of red or whatever, you simply make sure every piece is turned face-up at the start. Then all you have to do is scan all the turned up pieces to find what you’re looking for.
- It makes putting the puzzle together more enjoyable. There’s less of that ‘I can’t find that one piece with the white tip’. Because all pieces are turned up, you can easily find the piece you need and there’s no more ‘riffling’ in a box as you go.
- No lost pieces. You can put the pieces away at night. Similar to the way I cover my Jigboard, every night when I’m done puzzling, I stack my Jigsafe and put the lid on. The pieces are now safe from pets, kids, or what have you. It’s a terrible thing to lose a piece, so this is really worth it.
- You can slide the pieces right onto the puzzle when you’re ready for them. Be sure to get a piece storage device that has inserts that can be removed so you can slide pieces, face up, onto your work surface. The cheaper storage solutions don’t have this, so be sure you look at a product carefully before you buy. If there is no insert in the bottom of the boxes, you have to pick up each piece by hand to transfer it to your work surface.
As you move puzzle pieces from the big pile into the sorting boxes, pull out the border pieces as a first priority. If your puzzle is rectangular or round, you should be able to identify the border pieces because they have a straight (or curved) edge. I always put all the border pieces in the smallest (lavender) box, even if I have to layer them a little. If your puzzle doesn’t have obvious border pieces, because it has an irregular edge (like a shaped puzzle) just skip this part.
For all the other, non-border pieces, the main thing is to get them all face up and laid in the boxes. But while you’re at it, you might as well do some high-level sorting. For example, in this puzzle there was a pink-orange building that was very distinctive, various blue clothing items, and lots of greenery with flowers. I put pieces that were clearly in one of those areas in separate boxes. Other than a few obvious color areas like these, I don’t spend a lot of time obsessing over what box to put a puzzle piece while sorting. That can come when I’m working the puzzle. The main thing is just to get the pieces all face up.
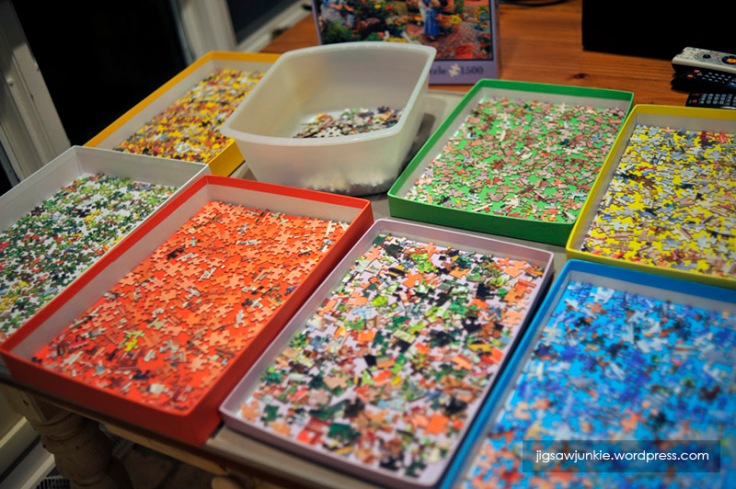
If you have more pieces than you have storage boxes, you can put any extra in a separate container (like I did here – this was a 1500 piece puzzle and the Jigsafe holds 1000 pieces). I tried to toss in the extra container pieces that were dark or green or otherwise didn’t jump out at me immediately as going in a particular area. As the Jigsafe boxes are emptied when I work the puzzle, I will fill in the space with pieces from the extra container.
If you don’t want to invest in a JigSafe or similar storage product, you can try using shirt boxes or long flat tuperware containers. Alternatively, you can just use the ‘dump them all in the puzzle box bottom’ strategy and look for pieces as you need them.
3. Assemble the puzzle border
If your puzzle has an irregular border (like a shaped puzzle) or has a very difficult border (for example, all one solid color), then you should skip this step and put the border on as you go or even at the end.
The main advantage of assembling the border first is that it gives you a framework within which you can lay out the rest of the puzzle. It forms the XY axis of your grid. And it also gives you lots of edges to attach to along the sides.
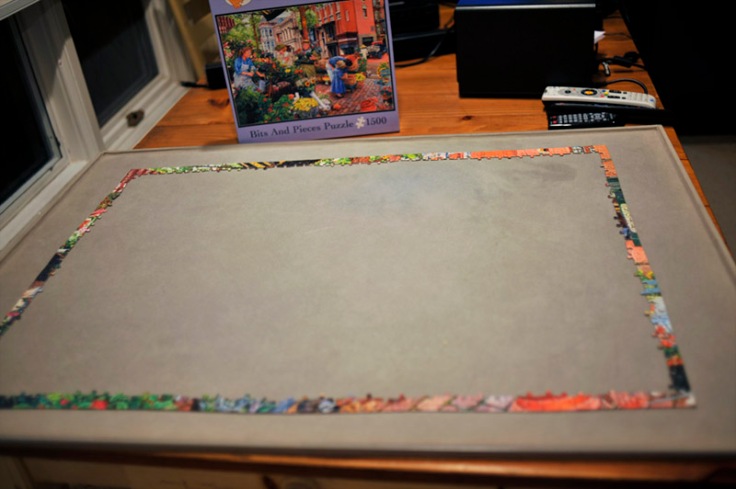
At this point, I have all my border pieces isolated in the smallest storage box. I put the other boxes away and slide the border pieces onto my work surface.
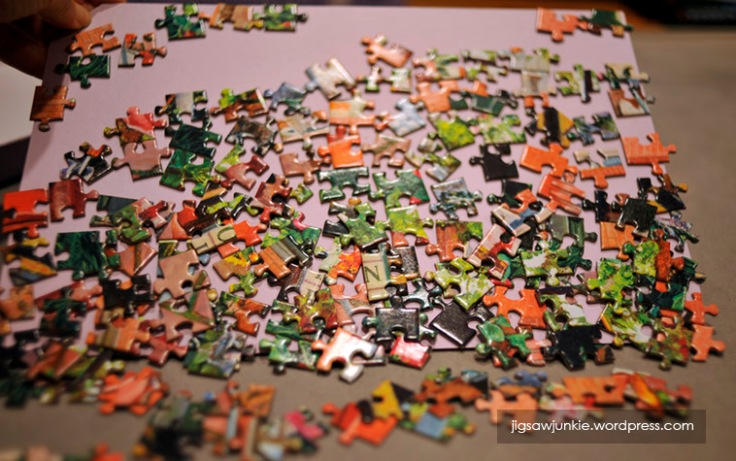
This is where it’s really handy to have storage boxes with an insert in the bottom because you can just lift the insert out and slide the pieces onto your work surface face-up, like in the photo above.
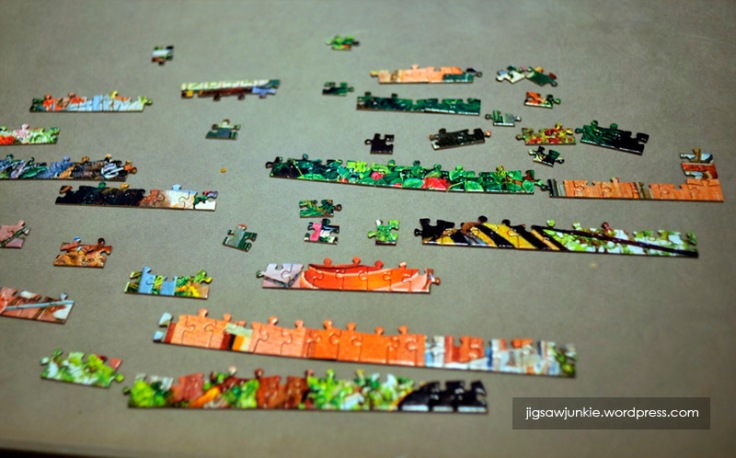
When assembling the border, I generally just put together pieces based on color and pattern for as long as it’s easy. So I end up with something like the photo above.
At this point, I look at the puzzle image and start moving around the sections to where they actually should go. Then I can connect the sections and add in pieces to fill out the rest until the border is complete.
4. Assemble the 3-4 easiest areas of color/pattern first
Many puzzles are a combination of relatively easy, obvious areas and areas which are more mixed, dark, monotone, or vague (like a huge area of blue sky). Let’s take a look at the image in this sample puzzle.
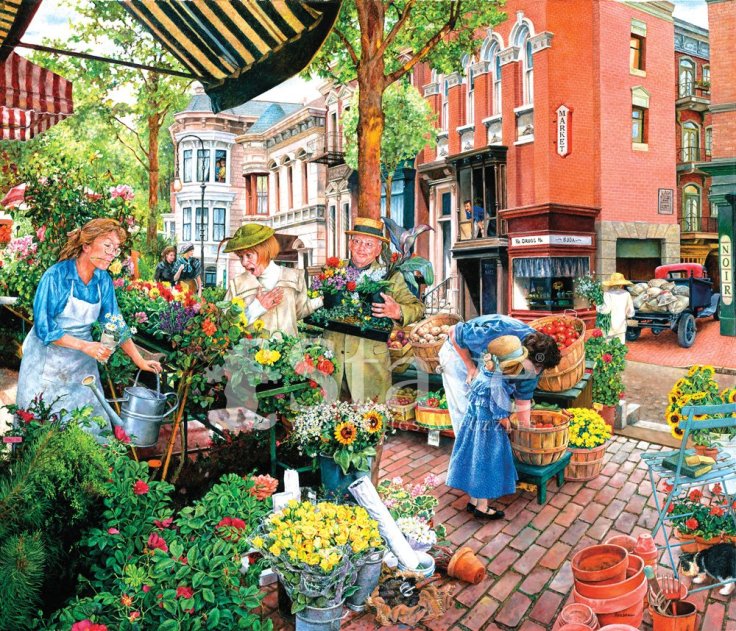
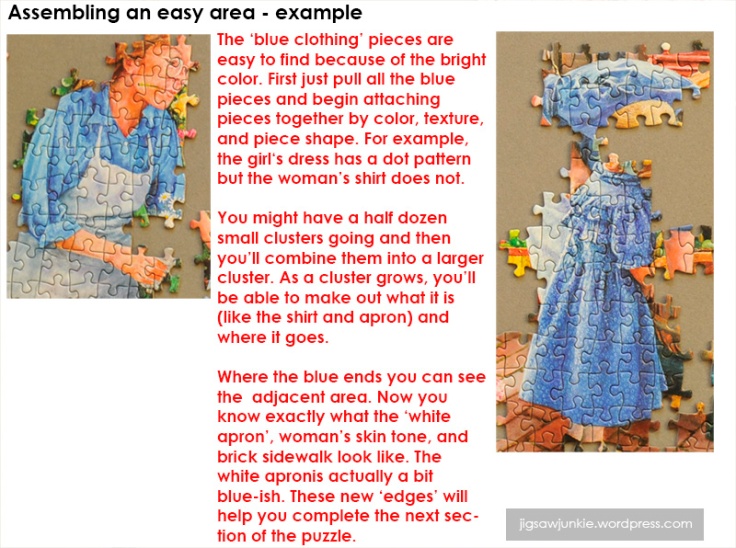
Looking at this image, I would say the easiest areas are: the large pink brick building, the bricks on the ground in the lower right, the blue clothing, the red-and-white awning in the upper left, the yellow flower clusters, the faces, and the white-ish buildings with blue windows in the background. When I did my sorting, I already isolated the pink building pieces and blue clothing. Notice that I didn’t chose the greenery as an ‘easy’ area. That’s because there’s quite a lot of greenery spread out all over the image, and greenery tends to be a random pattern that isn’t as easy to assemble. So I’ll wait to do those spots.
5. Once several areas are assembled, take a moment to arrange them in place in the frame
Working a jigsaw involves not only color/pattern recognition but also spatial relationships. Usually after I have several ‘easy areas’ or vignettes, I spend a few minutes arranging those areas within the frame of the border, placing them as close to their final place as I can just with eyeballing. If your puzzle has a border, you can use it as reference, lining up with two sides like an XY table.
Below is my example puzzle so far with the the areas I thought were the ‘easiest’ now assembled:
Some areas attach to the puzzle border, so they are already locked in the right place. But some, like the faces in the middle, are floating at this point. Let’s put them in the right place.
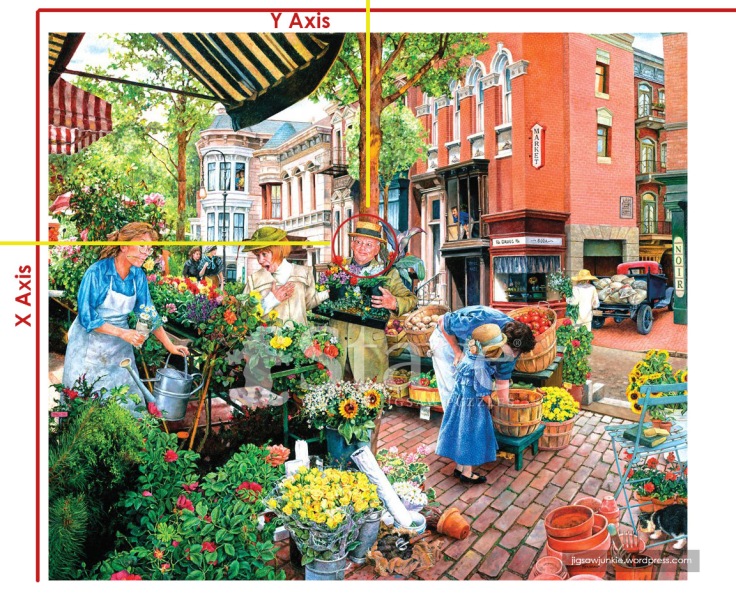
Above: in the image, we can see the man’s face in the middle of the composition lines up with a pinkish pot on the “X Axis” border. On the “Y axis” border, he lines up with the tree trunk. Using the puzzle border I completed, I can place the man’s face roughly in the same spot on0 my work surface.
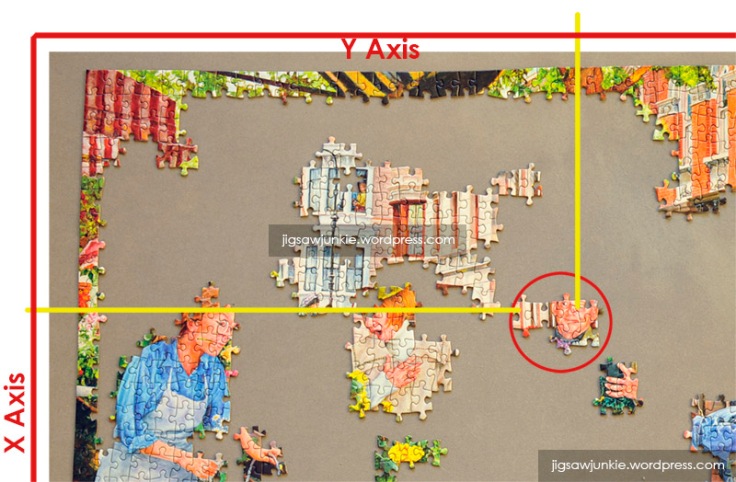
By placing finished areas in their correct spatial location, you might see that they actually link to a nearby section (the man’s face is close to linking with the white/light pink buildings). Or, as you find additional pieces, you can easily tag them onto a completed section and won’t have to worry about moving it later on.
All the areas you’ve assembled so far can be fit into the frame with this technique before you move on.
TIP: Don’t waste time ‘trying’ pieces that visually don’t fit. This may seem obvious, but when I sit down with new puzzlers, I see them pick up one piece and try it in many places all over, even in places where it obviously could not go. It’s as if they hope it will just ‘work out’ . This is spinning your wheels. LOOK at the piece and the edges first. When you attempt to attach a piece to an edge, you should be at least 80% sure it will fit. Do the colors and patterns on the edges you are attempting to connect match? Is the knob and hole that will connect roughly the same size and shape? I do so many puzzles that now I rarely try to attach a piece where it doesn’t go. I’m actually surprised when a piece I attempt to put in place does’t work!
6. Repeat Steps 4 & 5 through all the ‘obvious’ or ‘easy’ sections of the puzzle
As long as you have clearly defined areas within the composition, you can continue to a) isolate those pieces, b) assemble (if you run out of clear area on your workspace, you can assemble in one of the Jigsafe boxes), and c) put them into the correct spatial location in the puzzle.
Why work the easiest areas of the puzzle first? It’s more efficient and will save time for the following reasons.
- You are removing pieces from the playing field. When trying to find the pieces for a given area, your eye has to roam over all available unassembled pieces. As you move groups of attached pieces onto your board, you are removing those pieces from play, as it were. And that saves time when scanning for pieces for the next area to assemble. Choosing the brightest, easiest pieces to spot first just means when you get to the harder sections, you have less scan work to do.
- You are providing more and more ‘edges’ to attach to. As you scan the boxes for the next area’s pieces, such as ‘the greenery’, your eye will notice pieces that go with areas you already assembled since they are fresh in your mind. Oh, look, there’s a blue tip, that must go with the dress I just did. This is true, even if it’s not the piece you’re currently looking for. You can pluck that piece up and put it where it goes. The more ‘edges’ you have going on on the work board, the quicker the assembly will go. So create the most edges as fast as possible by doing the easiest areas first.
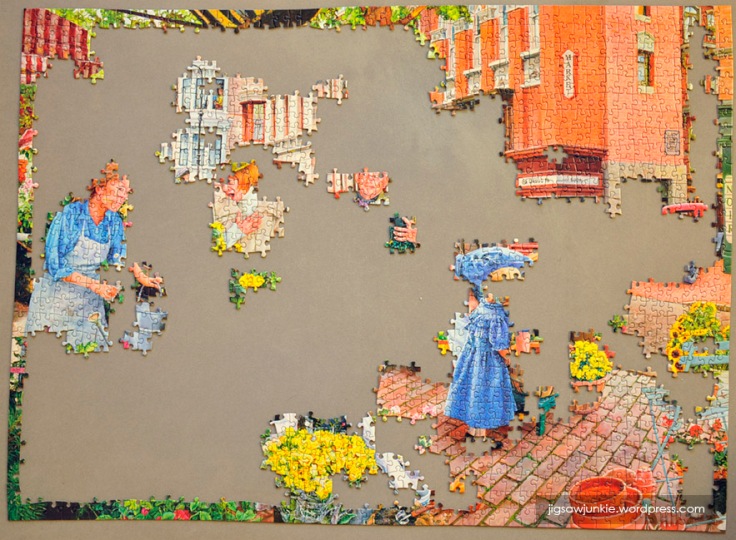
In the image below, I’ve assembled all the areas in the puzzle that have easy to recognize color and pattern. What remains are the greenery areas and the darker or vague areas.
7. Assemble harder color/pattern areas
Now that I’ve done the easiest areas I can tackle other areas that are a bit more difficult, large, monotone, or spread out. For example, a large area of plain blue sky might fall in this category (though not in this sample puzzle). So I’m going to do the greenery next. It’s a little harder because a) there’s quite a bit of it and it’s spread out in different areas of the puzzle and b) greenery (leaves, trees, plants) are a randomized pattern, not a regular pattern like bricks or clothing.
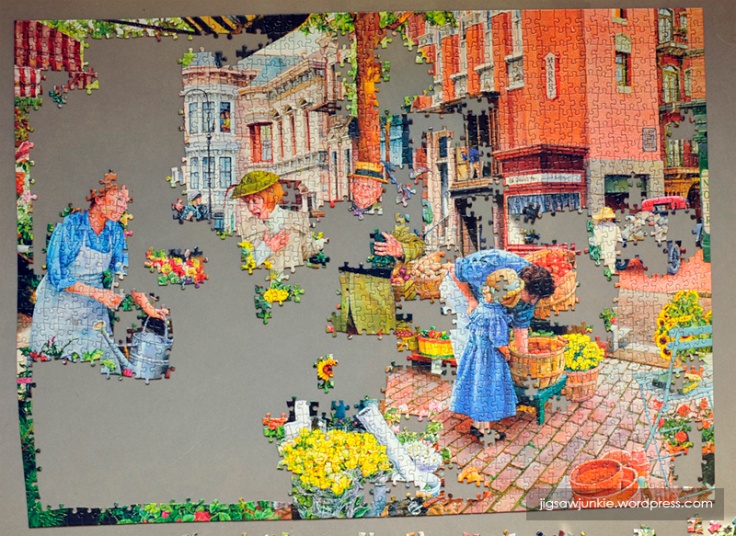
At this point, I have a lot less pieces to deal with and all the green pieces are in 3 boxes.
Even though this is all “greenery” (plants), it’s not all one color. There are darker greens, lighter greens, fuzzy greens (the trees) and detailed leaves (plants in the foreground) and bits of small flowers throughout. So I can work similar colors and textures into larger and larger groups and put them where they go in the puzzle.
Above: The greenery is complete. Now I only have darker and indistinct areas of the puzzle remaining.
TIP: If you try to fit a piece, and can’t figure out where it goes, don’t waste time on it. Chances are good it’s an ‘inside’ piece you don’t have edges for yet. Put it to one side in a hold area. Later on there will be a lot fewer places it CAN go (and new edges), so there’s no point in grinding gears on it now. Do set it aside though–I find myself picking up the same piece over and over if I don’t put it up in the corner of the Jigboard or some other ‘leave it alone’ designated area.
8. Finish up the dark or vague areas
Simple Shipping & Returns

FREE shipping on orders $75+.*
EASY returns on unopened items if something's not quite right. No problem!

WORLDWIDE shipping, we ship internationally to any country on the planet!
* Free shipping is only available in the contiguous United States. Read more on shipping policy and return policy.