
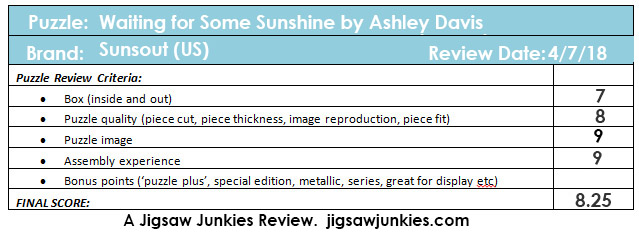
Review: “”Waiting for Some Sunshine” by Ashley Davis, Sunsout — 8.25/10
Publisher: Sunsout (US), published date 2017
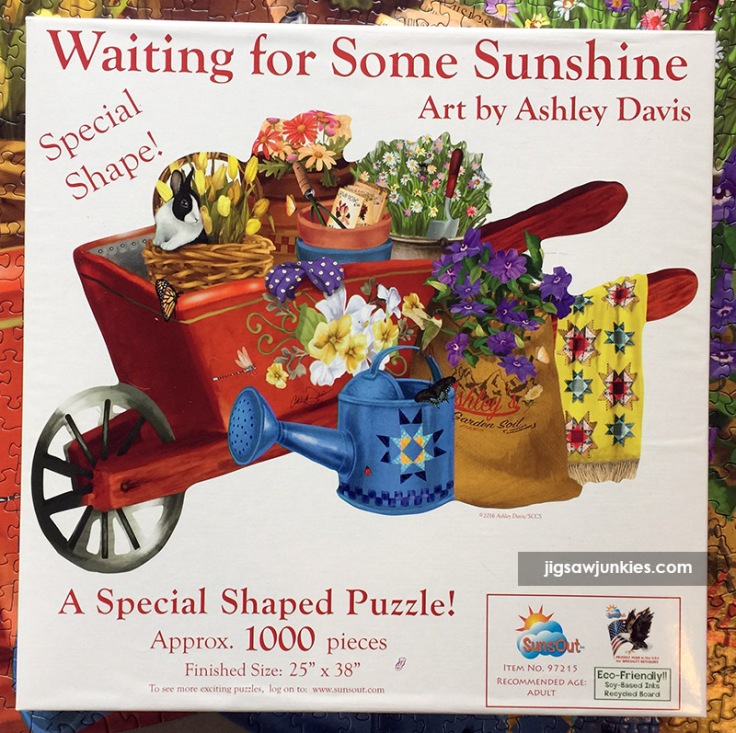
Title: “Waiting for Some Sunshine” by Ashley Davis, 1000 pieces
Finished size: 25″ x 38
OUR RATING: 8.25/10
This week Puzzle Warehouse is having a “Buy 2 Get 1 Free” sale on all Sunsout puzzles, so I wanted to review one. And it’s been a long time since I reviewed a shaped puzzle. So I picked this Spring-themed cutie. Let’s take a look!
YOU CAN SEE THE SUNSOUT SALE HERE.
Box Quality: (7/10)
The Sunsout boxes are very large and square in shape. They’re oversized compared to most boxes on the market. This takes up more shelf space but also provides a nice big image when you use the box lid for reference. The name of the puzzle, and artist’s name is prominent on the front. I really like how the artist is featured on both the front and all sides of the box.
Sides:
Three of the sides are the same, showing a tiny image of the puzzle, puzzle name, artist name, piece count, finished size, and Sunsout logo. The fourth side has a bar code and no puzzle image. The year of manufacture isn’t given.


Back:
The back of the box is plain white and made of a thinner cardboard.
Inside:
Nothing comes inside the Sunsout box except the bag of puzzle pieces and a very small paper slip with the company url. There was a fair amount of puzzle dust in the bag. The pieces were fully separated and undamaged.
The final box score is 7.
The Image: (9/10)
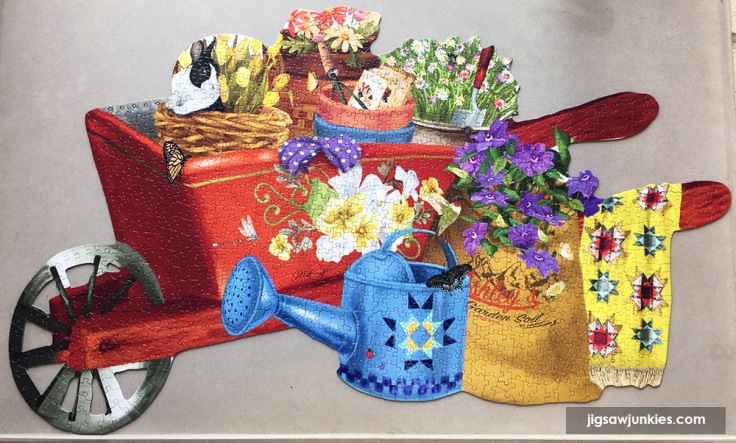
I love shaped puzzles and I can tell it’s a challenge to come up with an interesting new shape. This wheelbarrow shape is a cute idea and it’s filled with spring-themed items including flowers of various types, seed packets, and a bunny. The hand-painted art is fairly simplistic, but overall it works. I really like the wheelbarrow shape and how there are distinct color areas that made up “mini puzzles” within the whole. It certainly gives a feeling of spring.
(Click on any of the images in this review for a closer look.)
Puzzle Quality: (8/10)
Sunsout did well in our brand comparison. You can see our full brand comparison on Sunsout here.
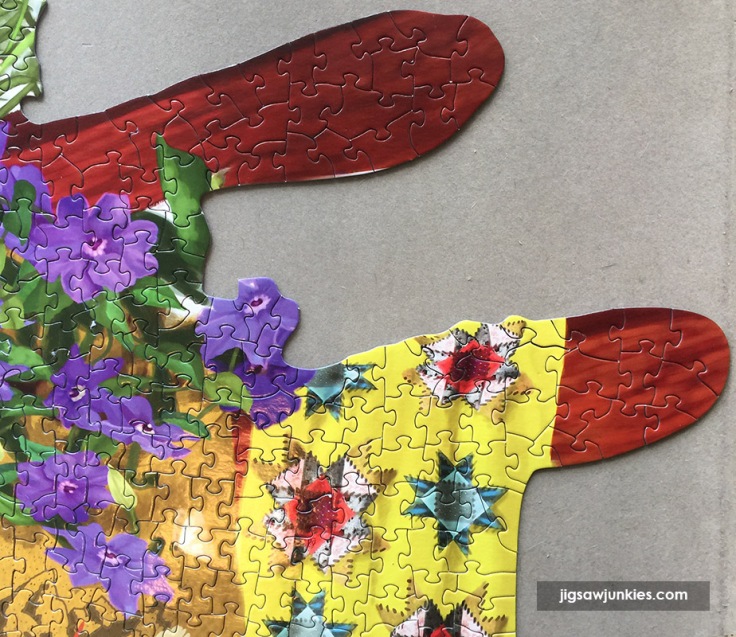
This 2017 shaped puzzle doesn’t vary much from the one we tested in our comparison. It has a HIGHLY random piece cut, as you can see in the close-up below (unlike some of Sunsout’s puzzles which still have a more or less row-and-column flow). I love this random cut. It provides a more interesting and varied assembly experience and also very few “it looks like it fits but it really doesn’t” moments because the piece shapes vary so widely.
The border pieces here are all good-sized too, without any super tiny pieces that would be easy to lose or bend.
This puzzle fit is about average in tightness. I had to use a lot of care moving pieces or they’d fall apart. Also, the pieces didn’t feel as thick to me as their regular rectangular puzzles. They were not so thin as to be an issue, but they were thinner.
The image reproduction and colors are excellent.
There is a glossy finish to Sunsout puzzles, which can cause glare under overhead lights at night. That wasn’t a big issue with this puzzle because there aren’t any very dark areas.
Overall, I’ve given quality a 8 score. I’m inclined to give any shaped puzzle a bit of leeway since so few manufacturers will even make them. This one has nice, clean edges and fits together well.
Assembly: (9/10)
I’d give this puzzle a “moderate” difficulty rating overall. Some areas are easy and some are a little more difficult. It took me three sessions to complete.
DAY ONE:
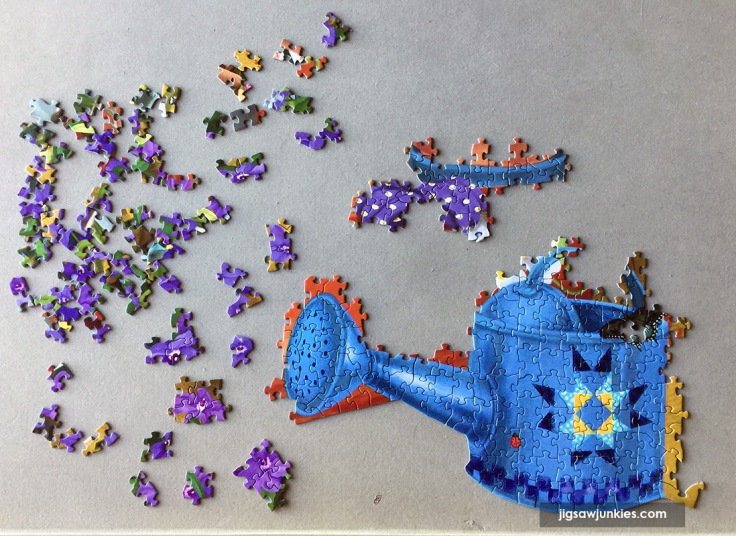
I usually do the puzzle border first, but not on a shaped puzzle like this. After turning up all my pieces in sorting boxes, I pulled all the blue and purple pieces.
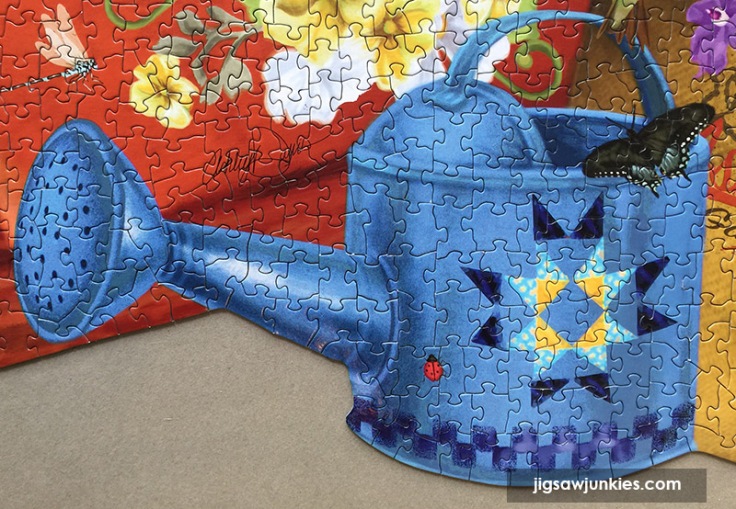
I rated assembly highly, and one of the things I liked about it was how it had distinct areas you could assemble where the color/pattern did not appear anywhere else. The blue watering can was done first, and that’s a good example. That blue color was easy to pull since it doesn’t apear anywhere else in the puzzle. The added quilt block design on the main body, and the “‘holes” in the head, helped to make it easy to assemble.
The purple flowers are a bit harder. The purple color is distinct to the gloves and the flowers, but the flowers are a random pattern. However, the little stamens in each flower were somewhat unique and by comparing them to the box, I was able to get the center of the flowers laid out in approximate position, which made the rest of the purple petals easier to fill in.
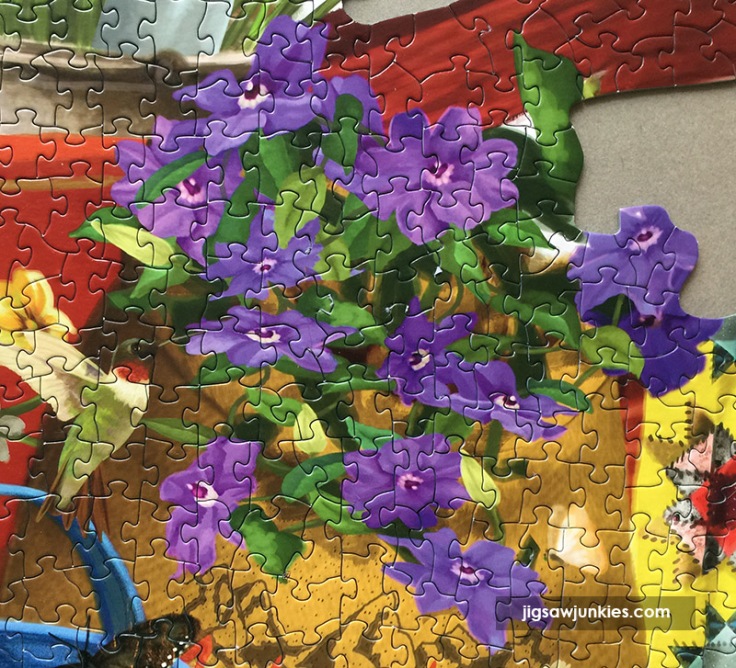
Above: Note how each flower stamen is slightly different.
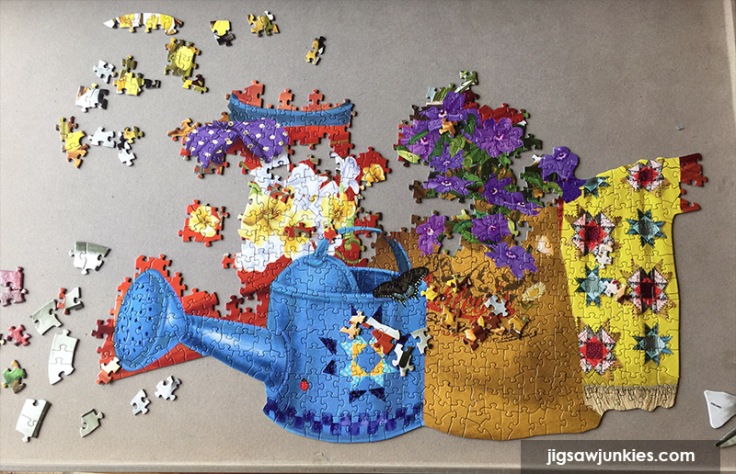
DAY TWO:
Sorry for the bad photo but I took it at night. As you can see, the Sunsout glossy finish can create glare in overhead lights. However, it’s not this bad if you are sitting directly over the puzzle.
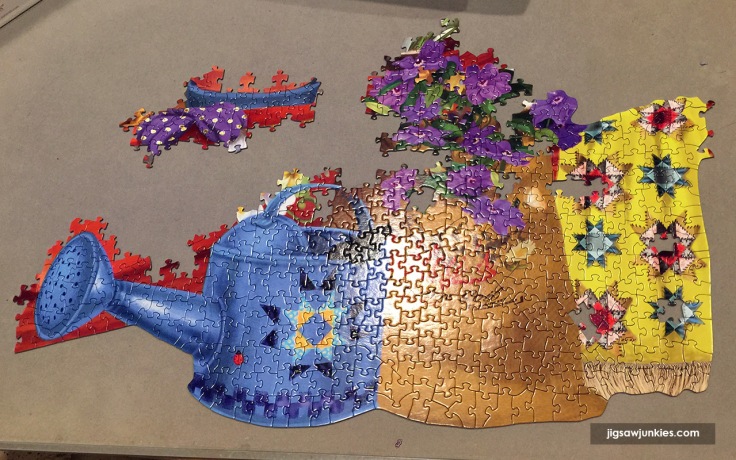
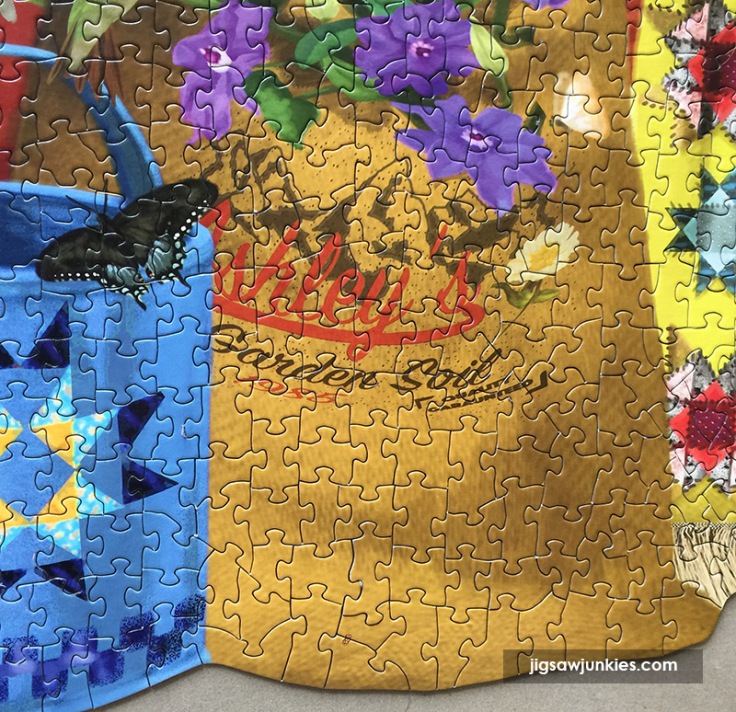
On the third day, I completed the two other large color block areas on the lower right – the feed bag and yellow quilt. Although there area some browns elsewhere in the puzzle, the exact brown color and texture of the feed bag is unique. Plus the writing on the bag helps make that section easy.
I really liked the irregular edge along this bottom right corner, aand the fringe at the bottom of the quilt.
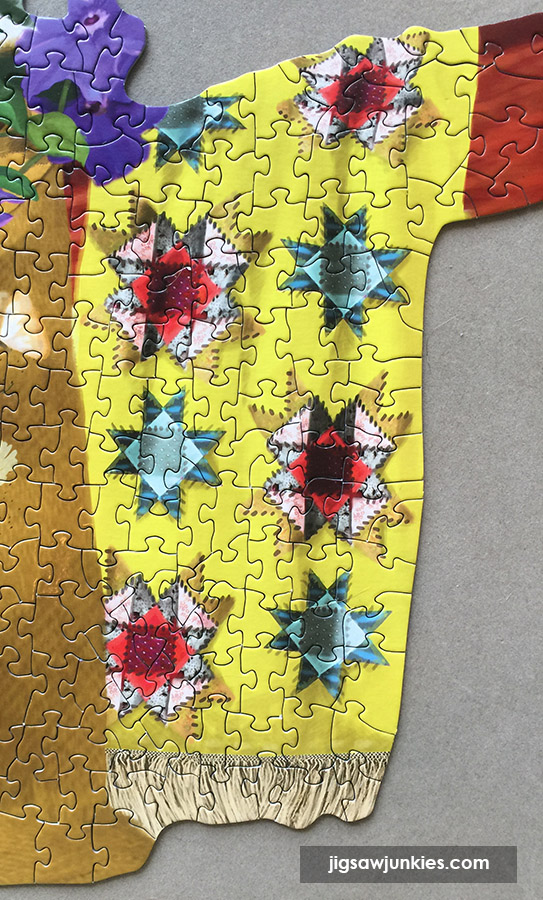
As you can see above, some border pieces are easy to identify with a large flat edge, but others have smaller flat areas. I like the variety of piece shapes and added challenge.
DAY THREE:
This was a long session as I found I didn’t want to stop until it was done! I first did the whites–the flower group painted on the wheel barrow, some bunny white, and some white around the tire.
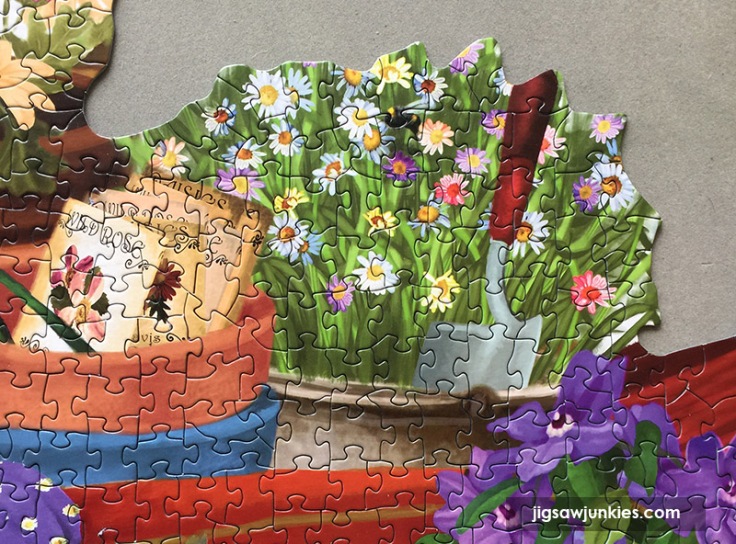
I spun the Jig Board around to do the top of the puzzle. I tackled the obvious areas first. The small flower bunch and large Gerbana daisy bunch at the top are small sections with unique colors/textures.
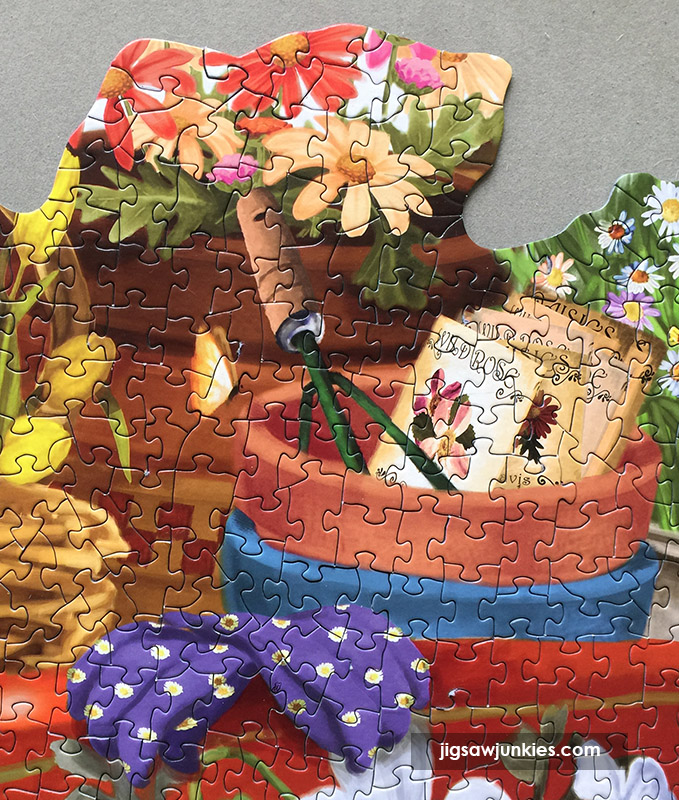
The seed packets in the pot have lettering on them, which makes for an easy texture to find in the sorting flats.
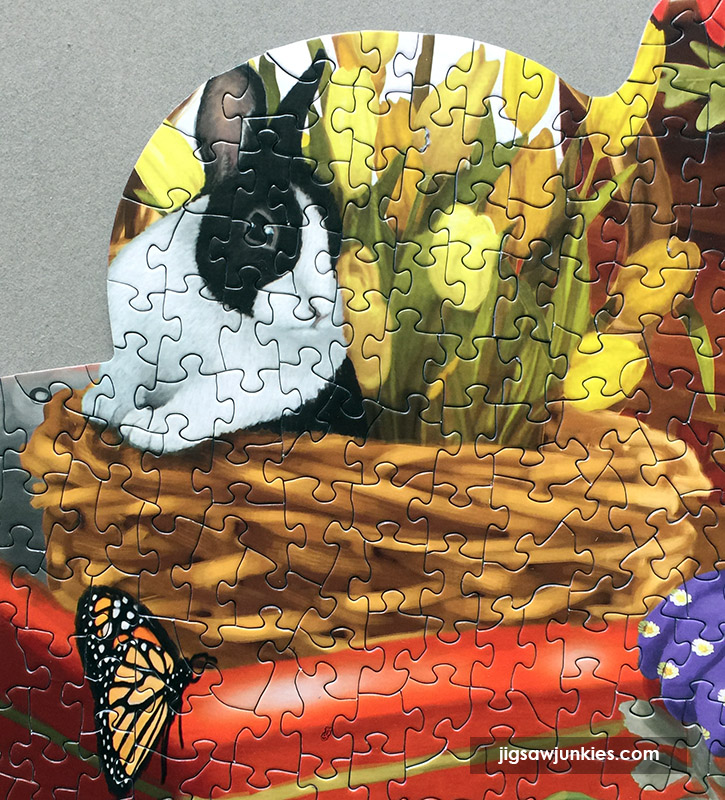
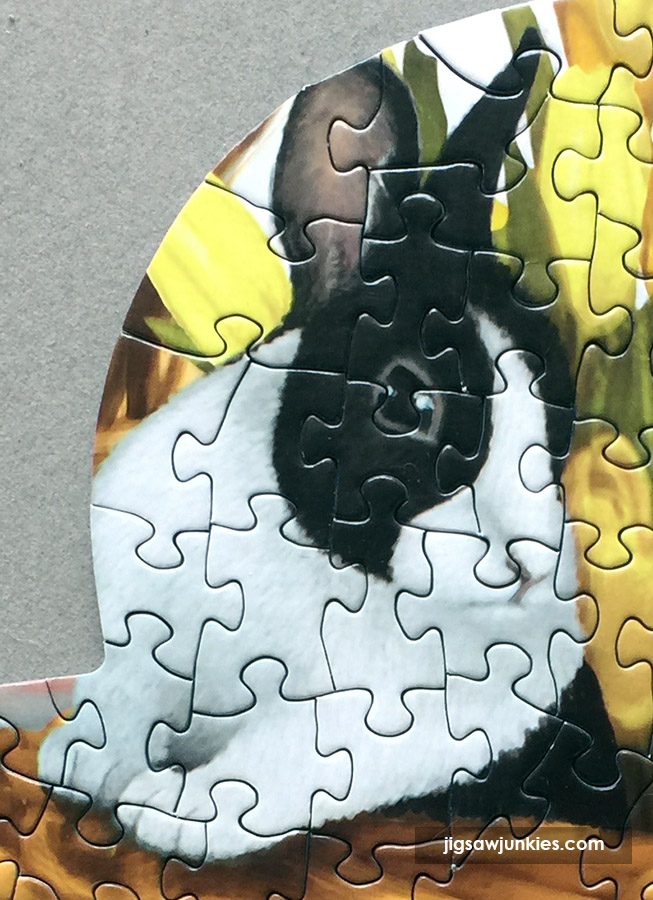
The bunnies and tulips are also pretty easy to pick out. I love the round shape around this grouping. I put together the brown basket then too. The woven brown texture is unique in the puzzle.
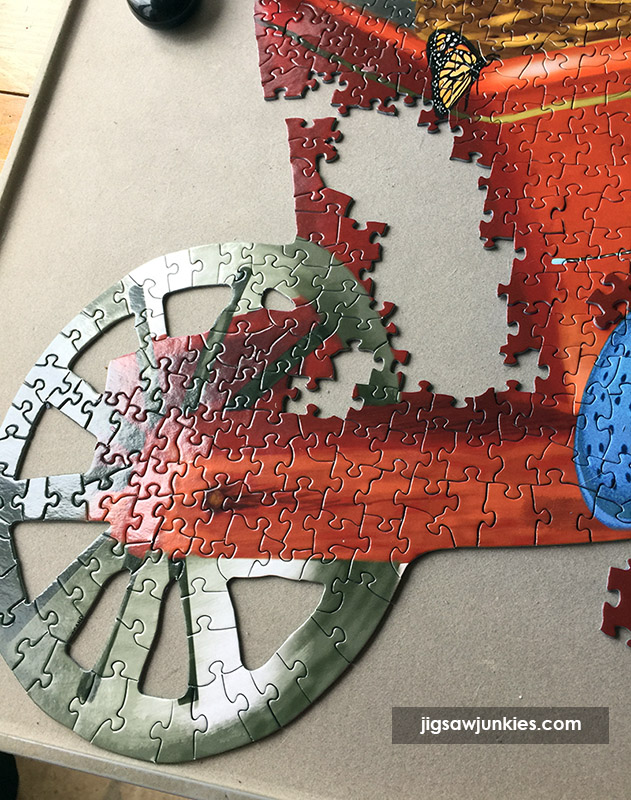
I found the wheel the most difficult and most interesting part of the puzzle. Because of the spokes, it’s a bit more difficult to figure out how the pieces fit together. But I liked this section the best.
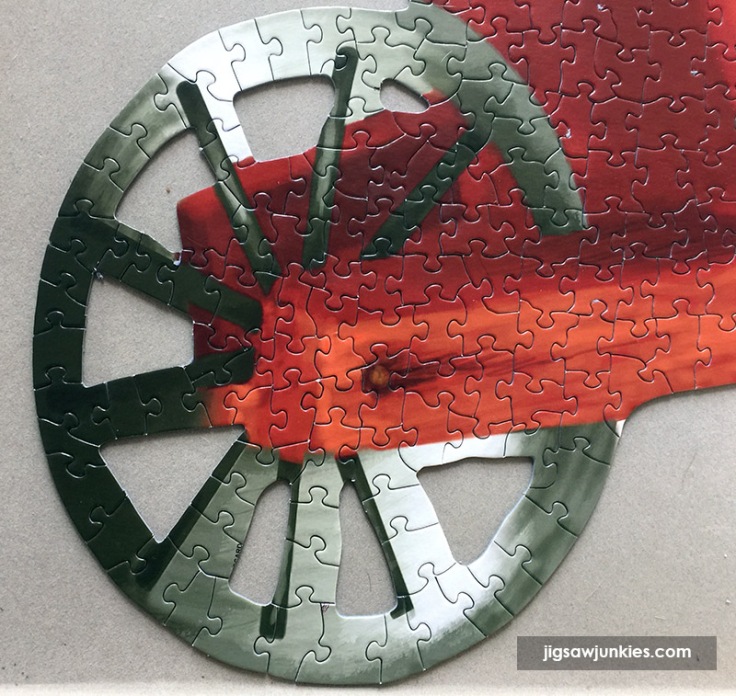
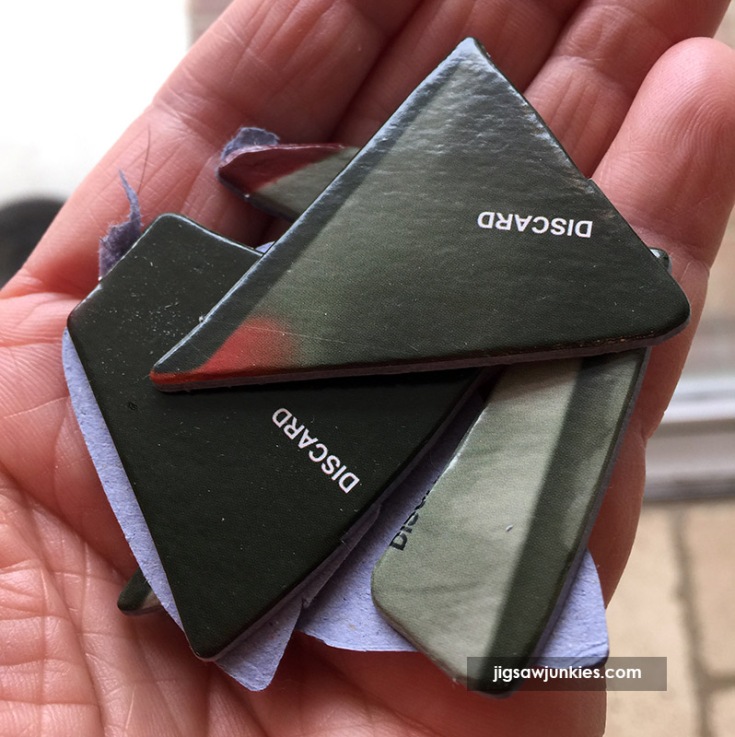
I’ve never seen this before in a puzzle, but the pieces from inside the wheel are in the puzzle box and marked Discard! I suppose this is easier (and safer) than trying to pick them out of the box and wind up accidentally taking out pieces that belong.
The last area of the puzzle to be done was the red wheelbarrow. There is a lot of red. But there are variations in shadow and light, as well as some woodgrain, that helps. Here are the handles.

The image below shows the last area to be done, the side of the wheelbarrow where much of the red is the same. However, with a little patience, it came together. The wide variety of piece shapes helps because you can look for piece shape rather than just color.
It’s been a long time since I did a shaped puzzle, and I was reminded how much I like them. They offer more variety and challenge than a “regular” puzzle. This one has a nice mix of easy areas (blue watering can, flowers) and more challenging ones (wheel, red wheelbarrow). I’ve given assembly a 9 score. I enjoyed it!
Summary:
“Waiting for Sunshine” is an moderately challenging puzzle that was a TON of fun to assemble. It has a nice mix of easy areas, like the blue watering can, and more challenging areas like the wheel and some parts of the wheelbarrow. I loved the unusual border and the wide variety of shaped pieces. The spring theme was fun too. The Sunsout quality is good with random cut pieces, a fit that is neither too tight or super loose, and good image reproduction. Recommended.
Where to find:
Click below to see the puzzle on Puzzle Warehouse.
![]()
CHECK OUT MORE SUNSOUT SHAPES PUZZLES
On sale til Apr 25th!
Simple Shipping & Returns

FREE shipping on orders $75+.*

EASY returns on unopened items if something's not quite right. No problem!

WORLDWIDE shipping, we ship internationally to any country on the planet!
* Free shipping is only available in the contiguous United States. Read more on shipping policy and return policy.