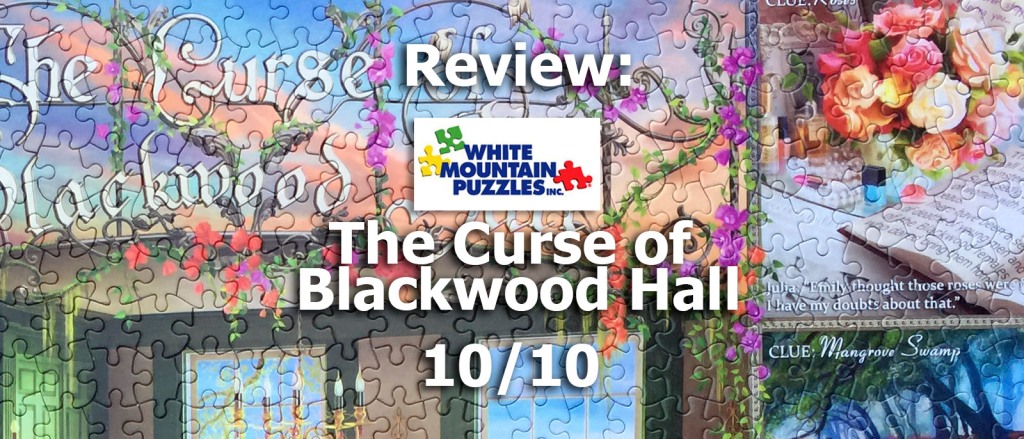
Review: “Curse of Blackwood Hall” by Pinkerton Road & Lena Pigareva, White Mountain 10/10
Publisher: White Mountain (US), published 2018
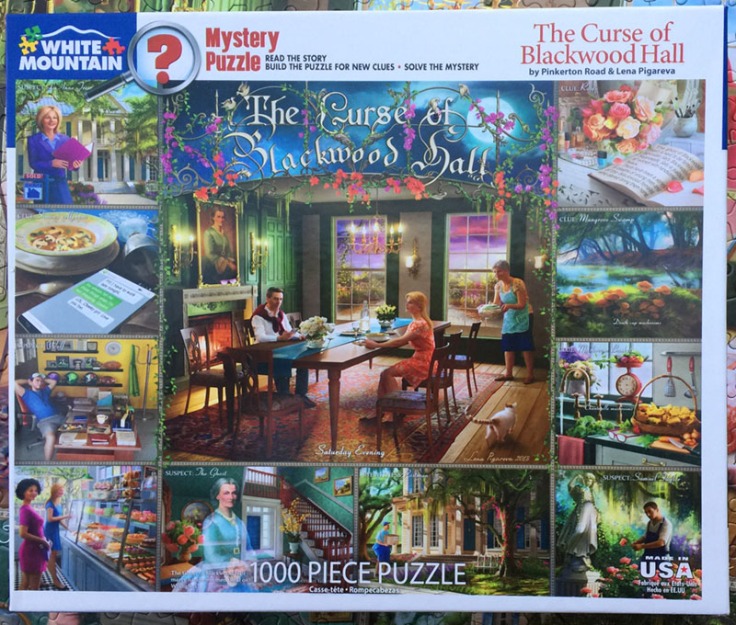
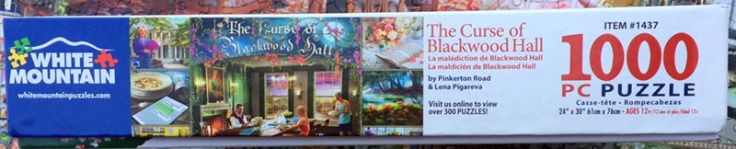
Title: “The Curse of Blackwood Hall” by Pinkerton Road & Lena Pigareva, 1000 pieces pieces
Finished size: 24″ x 30″ (1000 pieces)
OUR RATING: 10/10
I loved the idea of this brand new puzzle from White Mountain. It sounded similar to “Find the Differences” puzzles where the puzzle you assemble has some changes from the box image. Only in this case, those changes add up to the solution to a murder mystery. Get the full scoop on this new concept in this review!
Box Quality: (10/10)
The box front is shown above. The front shows the image, the puzzle title, and the piece count. The box size is roughly 10″ x 12″.
Back:
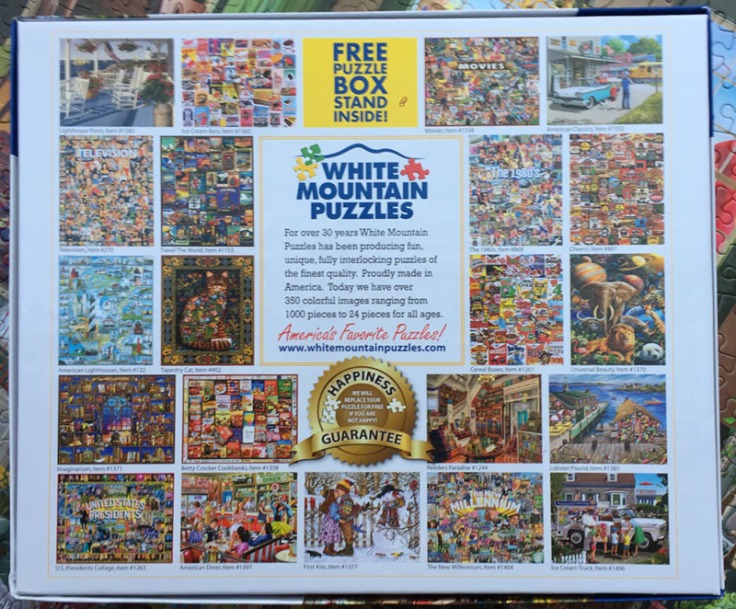
The back of the box serves as a mini catalog with more White Mountain puzzles. This is much nicer than a plain white back.
Sides:
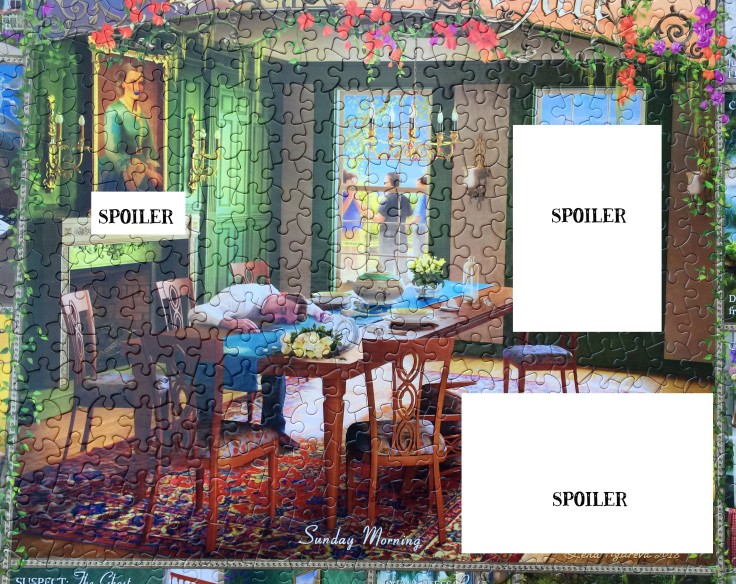
The sides of this box help explain the concept. I’ve turned one of the sides so you can read the text. It explains that the image on the box shows the scene BEFORE the murders on Saturday evening. The puzzle image shows the scene on Sunday Morning, after the crime has been committed. Each panel in the puzzle is about a SUSPECT or CLUE and includes details not shown on the box cover. Cool! As you can see from the image shown on this side, it does not look like the box image of that central area of the puzzle. The woman who is sitting in a chair on the box lid is now lying on the floor.
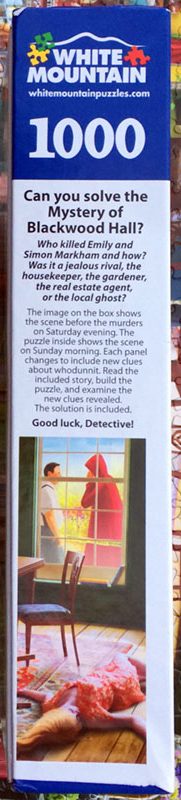
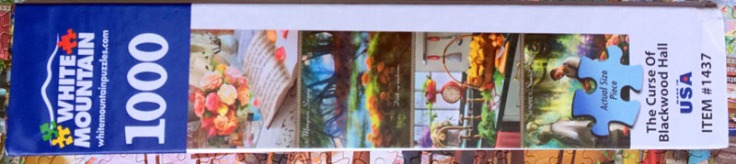

The other sides feature the name of the puzzle, the piece count, title, and White Mountain logo. The artist’s name (Pinkerton Road & Lena Pigareva) only appears in fine print in a copyright statement. The year of manufacture (2018) is on one side. I can shelve this puzzle with any end outwards and have a one-glance reference to what the puzzle is.
Inside:
There’s extra stuff in the box as well. This puzzle comes with the bag of puzzle pieces, a single sheet flyer with a few other puzzles on it, and a stand for the box lid. These items come in all White Mountain puzzles. But in addition, there is a large one-sheet colored page that has a story on it.
Perhaps White Mountain has improved their manufacturing process. I didn’t notice any puzzle dust. The pieces were undamaged and fully separated. I didn’t find any image lift, which I’ve seen in previous White Mountain puzzles.
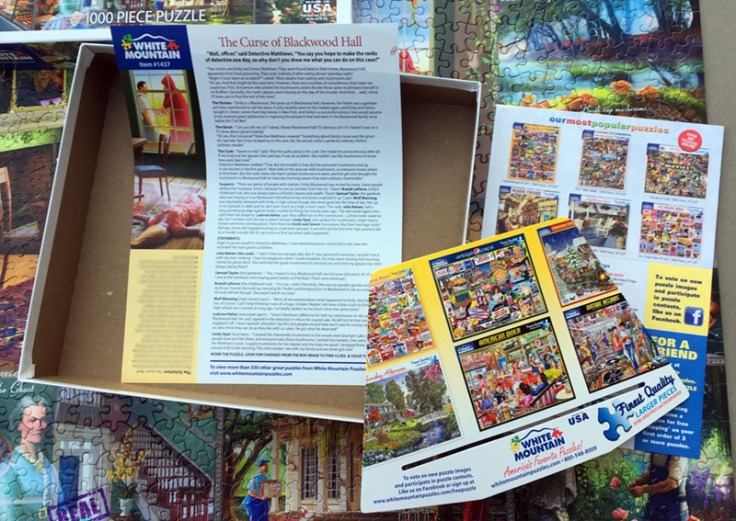
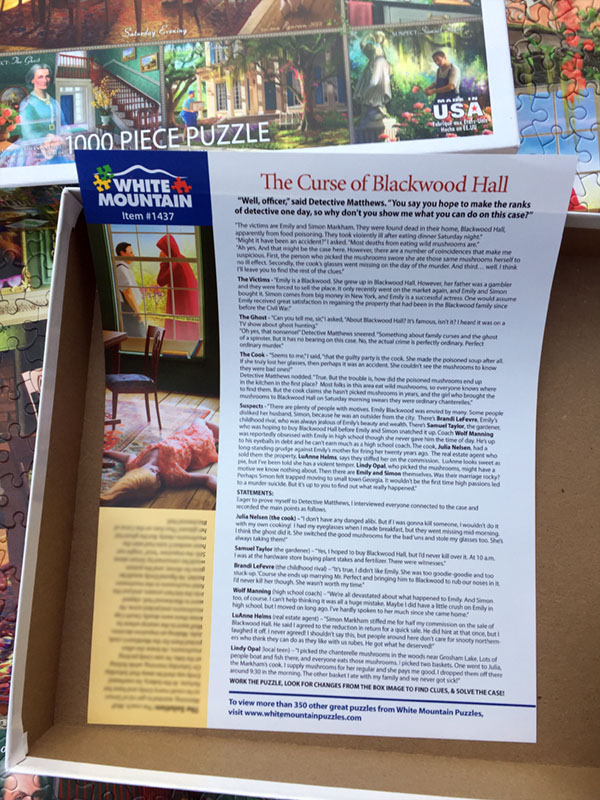
The included story is very Southern gothic and cozy mystery-esque. It’s interesting to read it before you begin assemble to give you a much better idea for the characters and locations in the art. The solution is printed upside down in the yellow area (which I blurred) so you can easily avoid reading it until you’ve done the puzzle and made your own guesses. The story gave an interesting set-up and had me itching to dive in.
It’s nice to see extras in the White Mountain box, and I love the concept. I’ve rated the box a 10.
The Image: 10/10
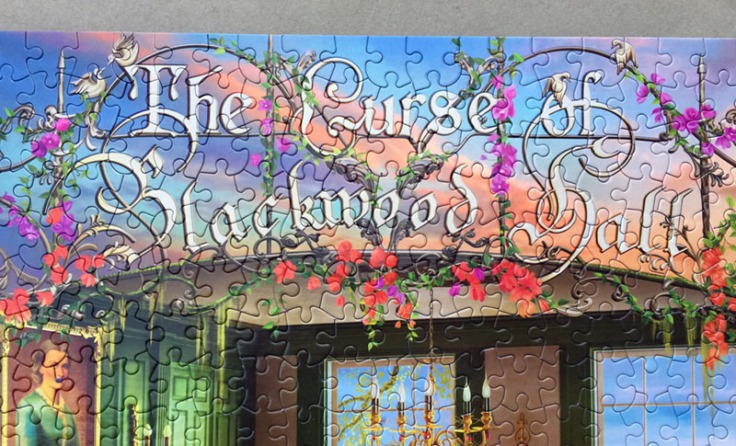
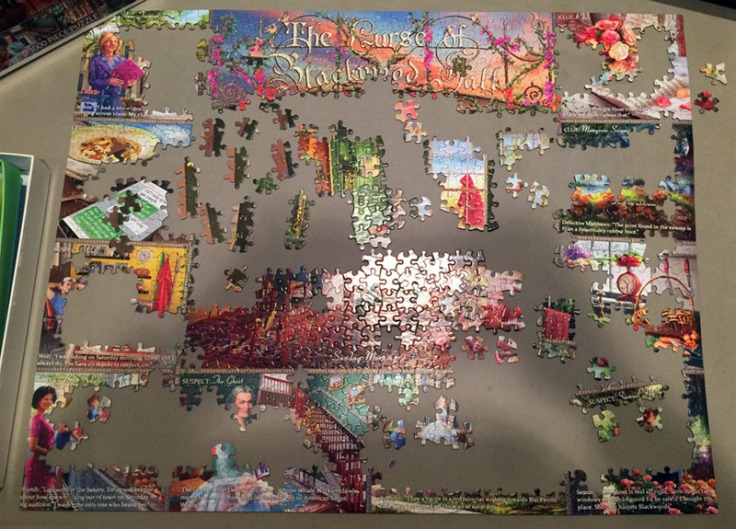
I love murder mysteries. One of my favorite puzzles of all times is Heye’s “Who Did It?” puzzle (which I reviewed here). I tried the murder mystery puzzles from BePuzzled, but, while the stories were cool, I wasn’t a fan of the basic photographic tableau look of the actual puzzles you put together. This puzzle, “The Curse of Blackwood Hall”, has a beautiful hand-painted look and a collage style which is very appealing. Here’s an overview look of the finished puzzle. I also really like the “dividers” between the panel, which are done in a wrought iron look. That’s something that’s easy to look for on the puzzle pieces.
(Click on any of the images in this review for a closer look.)
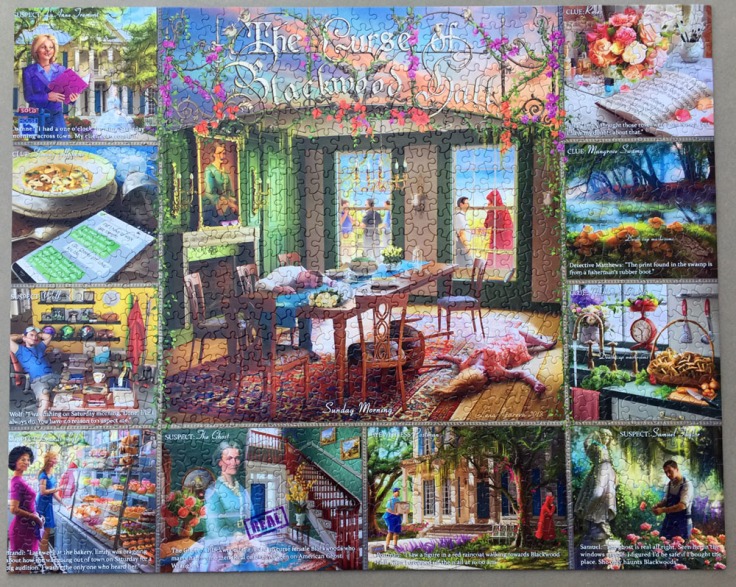
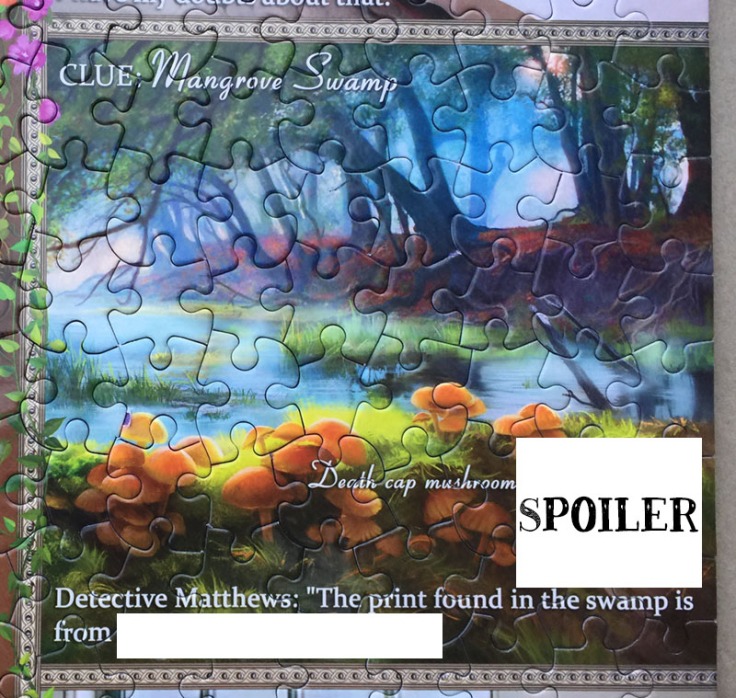
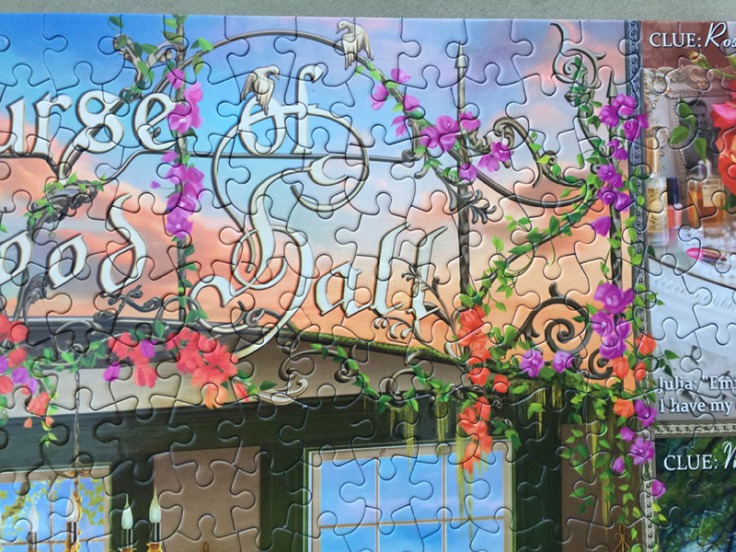
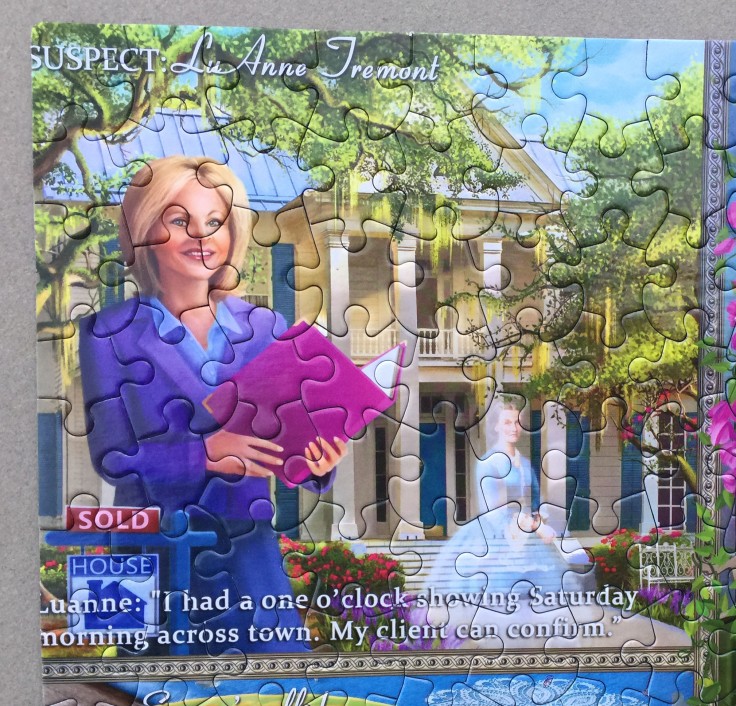
And here’s a closer look at one of the panels. I covered up some of the “clues” that are added to the puzzle image so I don’t spoil the fun for you.
The painted art style on this puzzle is soft and lovely with an almost air-brushed feeling. And even though this is a murder mystery, there’s plenty of bright color.
I’ve rated the image a perfect 10.
Puzzle Quality: (9/10)
I recently updated my White Mountain Brand Comparison page. This 2018 puzzle had no image lift at all (image lift is when the top picture part starts to separate from the cardboard background). So the quality was even better than the puzzle I reviewed in the brand comparison.
As I’ve mentioned in other reviews, I especially like the larger piece size (and final puzzle size) of the White Mountain puzzles. Because the final puzzle size is larger than most brands (24″ x 30″ for this 1000 piece puzzle vs a Ravensburger at 20″ x 27″), it feels like a real accomplishment when you’re done and you can really see the artwork. I also like the random cut and the very flat and seamless finish. As you can see in the close-up below, once assembled the puzzle lies very flat with no raised pieces and the cut really blends in. It’s not easy to separate the pieces once joined, so you can move groups of assembled pieces around without them falling apart. However, you do need to use care when separating mis-joined pieces to make sure you don’t damage a piece.
There is a glossy finish, but I didn’t have any trouble with glare on this puzzle. The colors and image reproduction are excellent.
I’ve given quality a strong 9 score for quality on this puzzle.
Assembly: (10/10)
I’d rate the difficulty easy-to-moderate. It took me threesessions to complete.
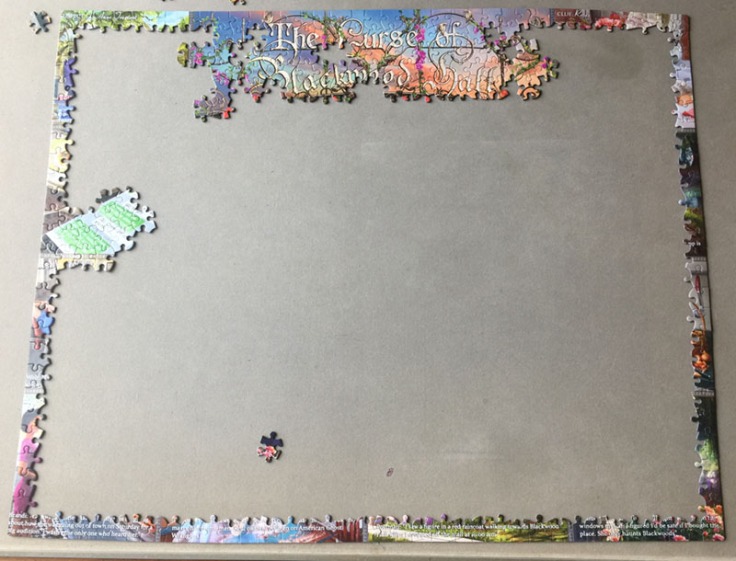
DAY ONE :
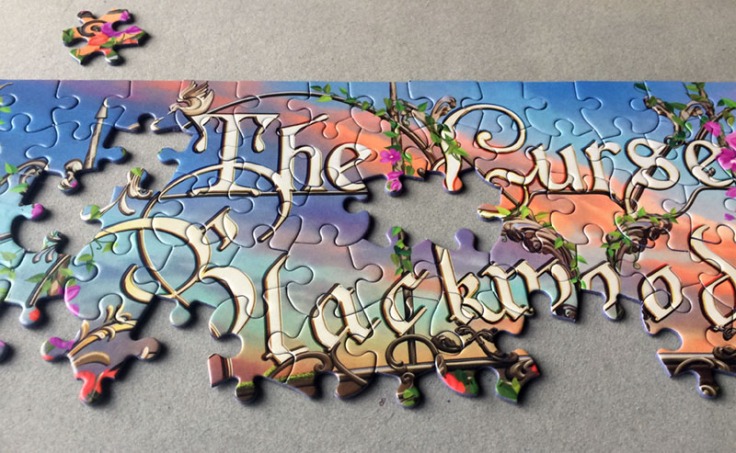
I first assembled the border and laid all the rest of the pieces face up in my sort boxes. The area that jumped out at me the most was the top of the puzzle with “The Curse of Blackwood Hall” title. The background behind the letters is a blue/pink morning sky, which immediately looks very different from the same area on the box lid, where the sky is night. That was an upfront reminded that “oh yeah, the puzzle will not look exactly like the box lid”, which heightened my anticipation, wondering what other surprises were in store.
The title of the puzzle looks like a wrought iron fence. There are purple flowers and birds to help you figure out the layout. These mostly match the box lid.
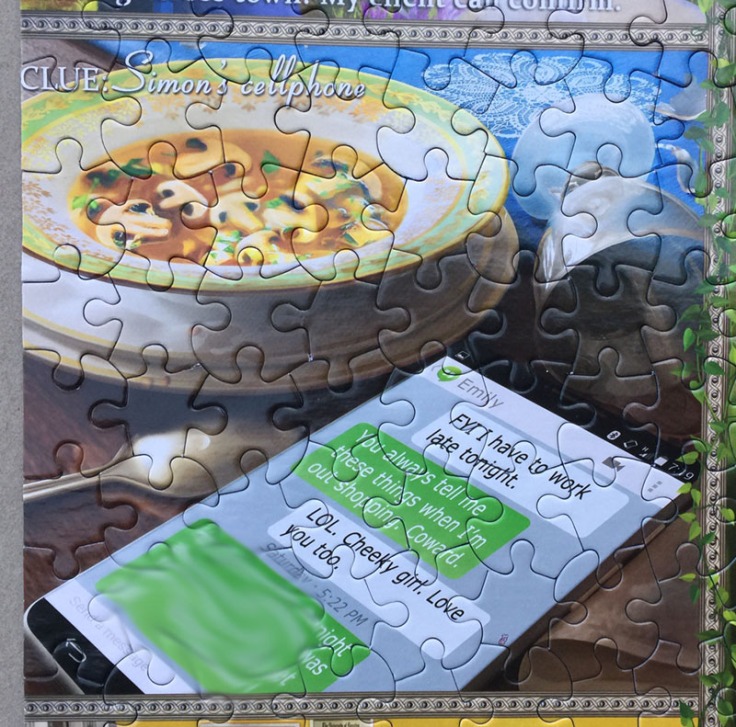
On the first day I also did the cell phone because the bright green text boxes were shouting at me from the sort boxes. There was more “bright green” than I expected from looking at the box lid. Check out the screenshots below:
BOX LID:

In the puzzle image, a new text message has been added. This is a clue as to what happened the night of the murder and why. I’ve blurred it out to prevent a spoiler.
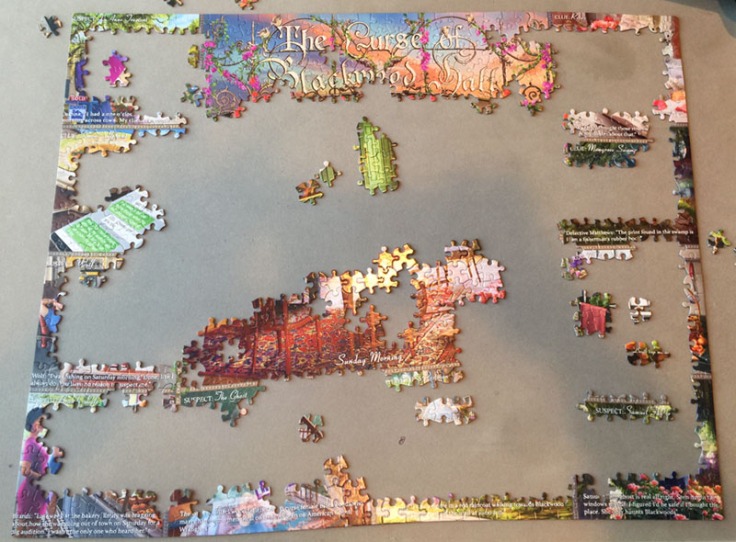
DAY TWO :
On day two, I first focused on the floor rug in the center of the puzzle. It’s an Oriental style rug in red, cream and blue. Around the rug area are brown sections of the dining room chairs. This gave me a nice central anchor to work from. I next put together all the areas of white text.
Most of the panels have white text added that is not on the box lid. Sometimes they are “statements” from the suspect and sometime they are reports from the police or other clues. I recommend reading the one-sheet story first as these statements make more sense if you read the story. Of course, you can ignore that and just do the puzzle, but it’s lots more fun if you don’t.
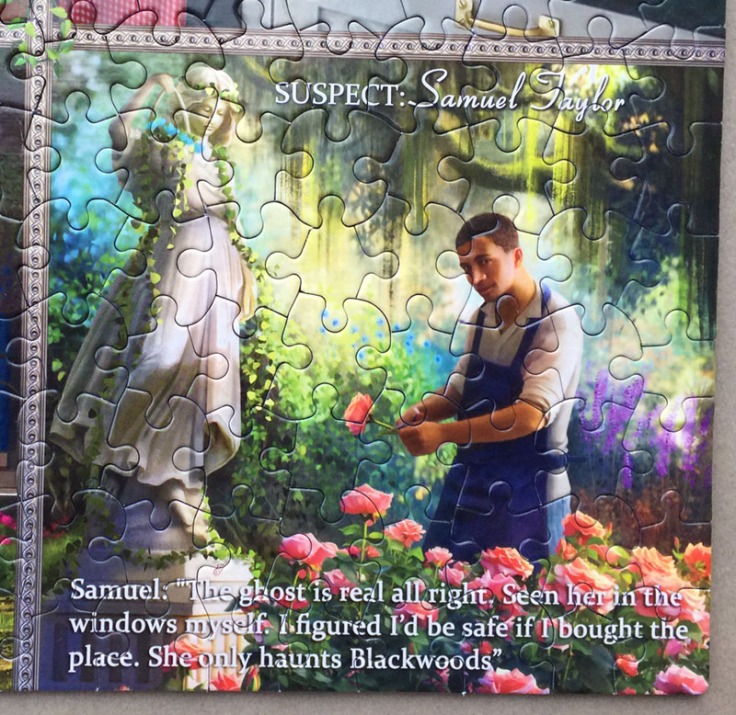
The next area to tackle was filling in the bright and more colorful areas in the various panels, focusing on the reds, pinks, purples, blues, and greens.
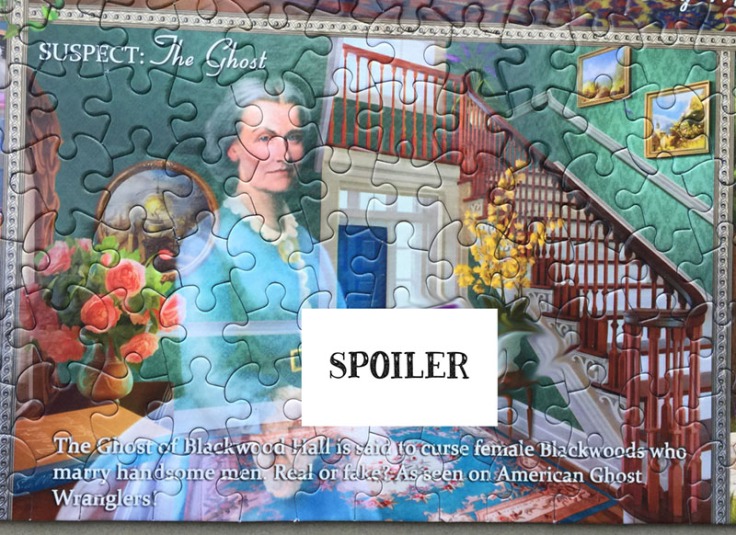
There’s good use of color throughout the puzzle and many panels can be recognized and assembled without much confusion with other panels. For example, the “Suspect: The Ghost” panel at the bottom is more aqua than other panels. As a reminder, I added those white “SPOILER” boxes to cover up clues so I don’t spoil the mystery for you. They are not in the actual puzzle!
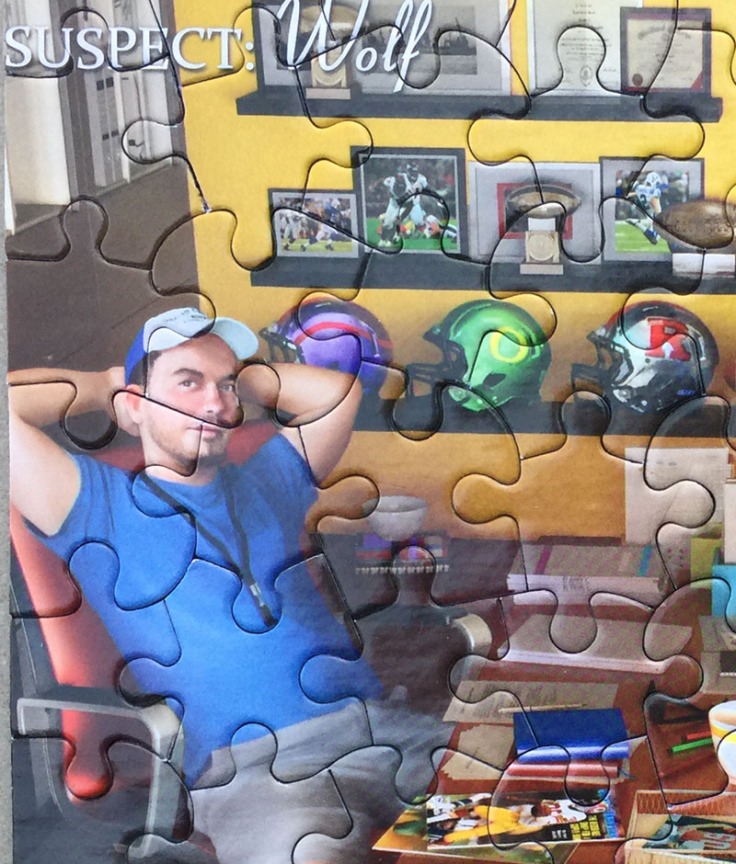
As another example, the panel about the suspect who is a football coach has a large yellow wall and true-blue shirt, colors not seen elsewhere.
The center of the puzzle has a green wall that’s easy to identify. As you assemble this area, you get to see the scene after the murder. The couple that were seated at the table on the box lid are now there, dead. So apparently the crime happened during the meal. There is no blood or other gory elements to this scene, simply the two characters in slumped postures. It reminds me of a PBS Agatha Christie episode. I’ve covered up some of the things I thought were spoilery in the picture below.
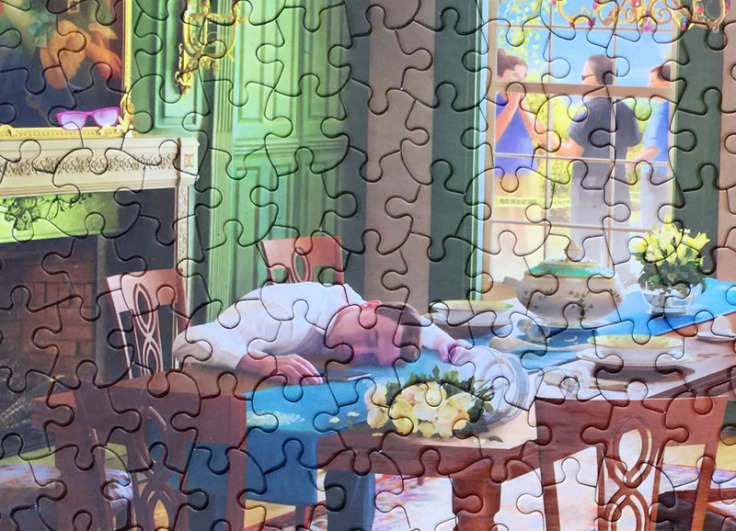
The scene out the two windows also changes, as it’s now daylight and people have gathered outside. There’s a clue in one of the window scenes.
DAY THREE :
After doing the obvious bright color and pattern areas (see “work in progress” image above), the remainder of the puzzle consists of darker areas, greenery, and the exterior of the house, which appears in several panels. It’s not especially difficult to finish assembly. You can still use the box lid as a guide since not *everything* about a panel changes. Mostly it’s small details, and these items are fun to discover as you go between the box lid and the puzzle.
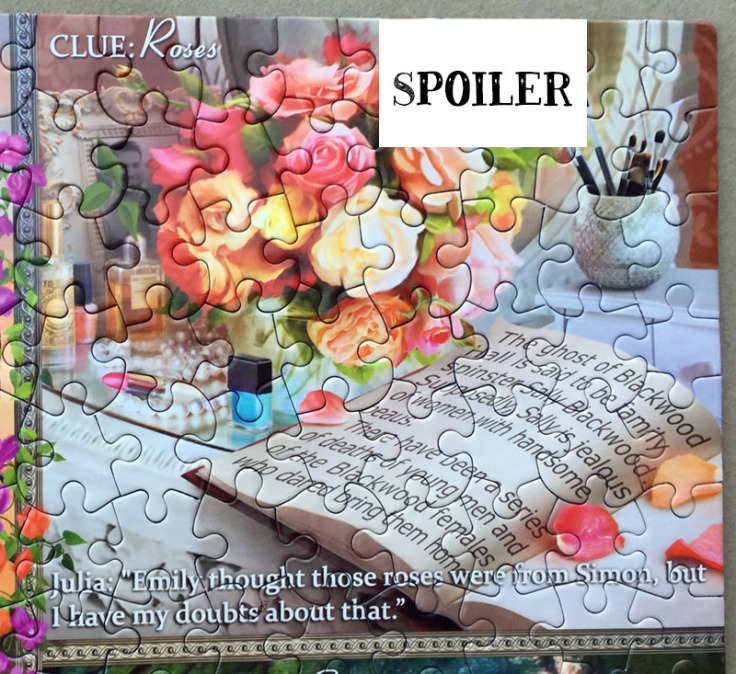
For example, the bouquet of roses in the panel below has a card added that hints who the roses are from.
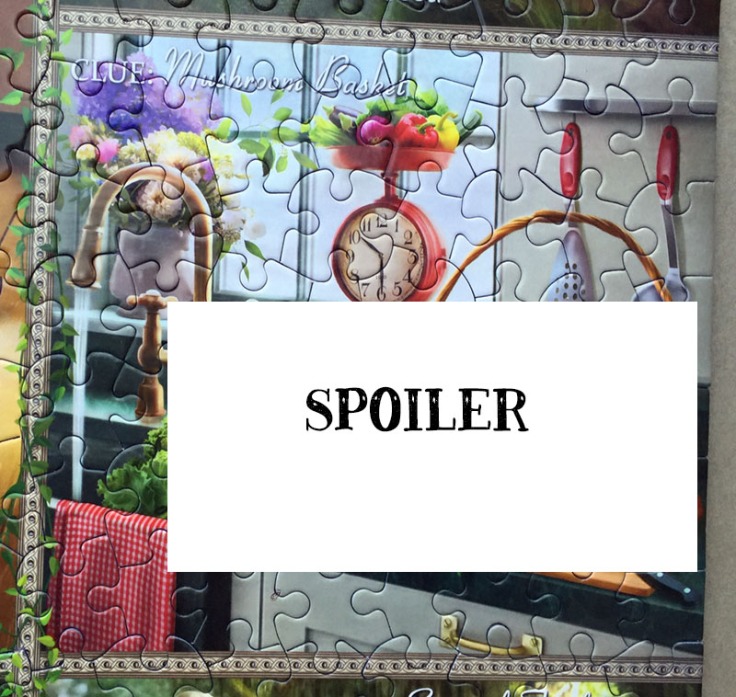
There are quite a few new clues added to this panel in the kitchen.
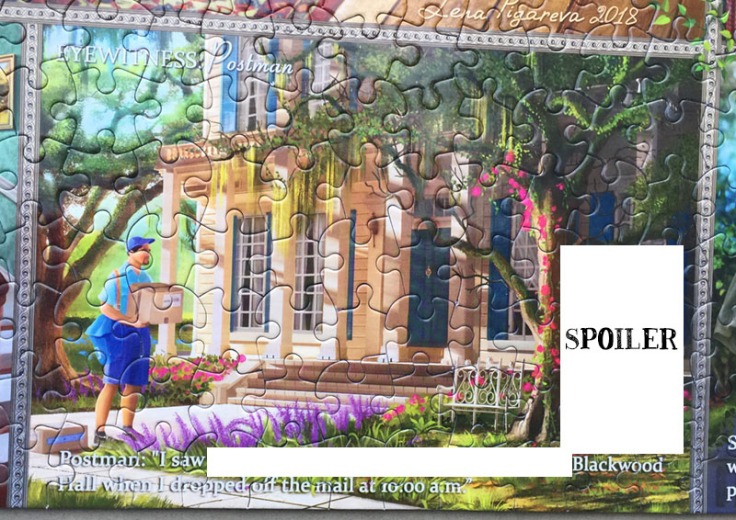
The “Eyewitness: Postman” panel gives a statment and adds something to this image that helps identify the murderer.
Overall, I loved this puzzle and I’ve given assembly a full 10 score. I loved the added dimension of seeing the new clues appear as I put panels together.
Simple Shipping & Returns

FREE shipping on orders $75+.*

EASY returns on unopened items if something's not quite right. No problem!

WORLDWIDE shipping, we ship internationally to any country on the planet!
* Free shipping is only available in the contiguous United States. Read more on shipping policy and return policy.